This guide describes step-by-step how to install the ‘official’ Monero GUI wallet and local full node (Monero blockchain) on Tails operating system.
Preamble
Why Monero and why a local node
Monero is first and foremost a financial privacy tool which obfuscates user's transactions. And the local node is for those who need to be very sure this privacy is not violated.
Privacy of transactions
The most important feature of Monero is transaction privacy. Monero’s mechanism is similar to cryptocurrency mixers, but much more secure.
If user B receives Monero from user A and sends Monero to user C, no one will ever know unless user B wants them to. Bitcoin mixers, for example, can’t offer such guarantees.
Have much less heat than mixers
Mixing cryptocurrency, whether it’s bitcoin or Ethereum, does not go unnoticed – an outside observer knows if a particular user’s cryptocurrency was obtained from a crypto mixer. Such cryptocurrency is often not accepted by cryptocurrency exchanges. Sometimes they even freeze it until proof of origin is provided.
In the case of Monero, there are no such problems – this cryptocurrency is private by default. It is impossible to distinguish between an ordinary citizen and a user who carefully hides the origin of his Monero. Exchangers who are not happy with this simply do not work with Monero, and all other exchangers generally do not ask unnecessary questions.
Other ways to do this...
...are either for experienced users, or way less secure.
- There are alternatives to the setup "Tails + local node", such as:
- An .onion remote node on a separate computer (e.g. with PiNode-XMR)
- Monero GUI Wallet on Whonix or a similar privacy oriented OS
They are way more complicated and less mistake-proof in terms of cybersecurity than Tails setup. For experienced users only.
- You may use a third-party remote node with mobile & light wallets if your threat model allows this. This is not a very secure way to obfuscate Monero transactions.
Who needs this
Anyone who wants to hide where their cryptocurrency comes from and where it goes. To hide things like:
- Donations to political opposition or other ‘undesirable’ organisations and individuals (from opressive regimes)
- Size of assets (from the public)
- The fact of payment for certain goods and services (from the public or law enforcement)
Monero can also be useful for those who have unwittingly received a cryptocurrency (most commonly bitcoin) with a ‘dirty’ past. For example, if the cryptocurrency was previously used to buy goods on the darknet or came from a bitcoin mixer, it may not always be possible to exchange it for ‘regular money’ (fiat) – exchangers using special software can see the history of the cryptocurrency coins and may refuse to accept them.
An ordinary citizen who has been paid with such a cryptocurrency can exchange ‘dirty’ bitcoin for Monero at an exchange that does not care about the origin of the crypto coins or the identity of the user. And then Monero can be safely exchanged for ‘clean’ cryptocurrency or fiat in any exchange.
Step-by-step instructions
To anonymously get rid of ‘dirty’ cryptocurrency, or the other way around, to anonymously send cryptocurrency to an ‘unsafe’ recipient, you need to:
get Monero => send Monero to yourself several times in the Monero GUI wallet to 'clean' it (obfuscate its history) => use ‘clean’ Monero
What to prepare
1. Privacy-oriented operating system, in this case – Tails. Installation instructions: https://tails.net/install/
2. Data storage
It is recommended to use the best data storage on the market. USB sticks and SSDs of the latest models are not much more expensive than the budget ones, but the difference in performance is huge (see what read and write speed is specified by the manufacturer).
The read and write speed of an SSD is much better than that of a USB stick.
Typically the fastest speed is via a Type-C cable. If Type-C is not available, it is best to use USB 3.0 or higher.
!NB
In rare cases, some M.2 SSD models may not work with USB 3.2 cables at various stages of Monero Wallet installation and use. In this case, use an older cable version (USB 3.1 or older).
The blockchain can be stored on the boot drive (on the same media as the operating system) – in this case you will need a single storage device with capacity of >512GB.
You can store the blockchain on a separate storage device, in which case you will need one more storage that contains the operating system (~16 GB is usually sufficient).
3. Choose a cryptocurrency exchange that does not block funds and does not require identity verification (i.e. has no KYC/AML policies) here:
https://kycnot.me/
http://kycnotmezdiftahfmc34pqbpicxlnx3jbf5p7jypge7gdvduu7i6qjqd.onion/
Prepare Tails
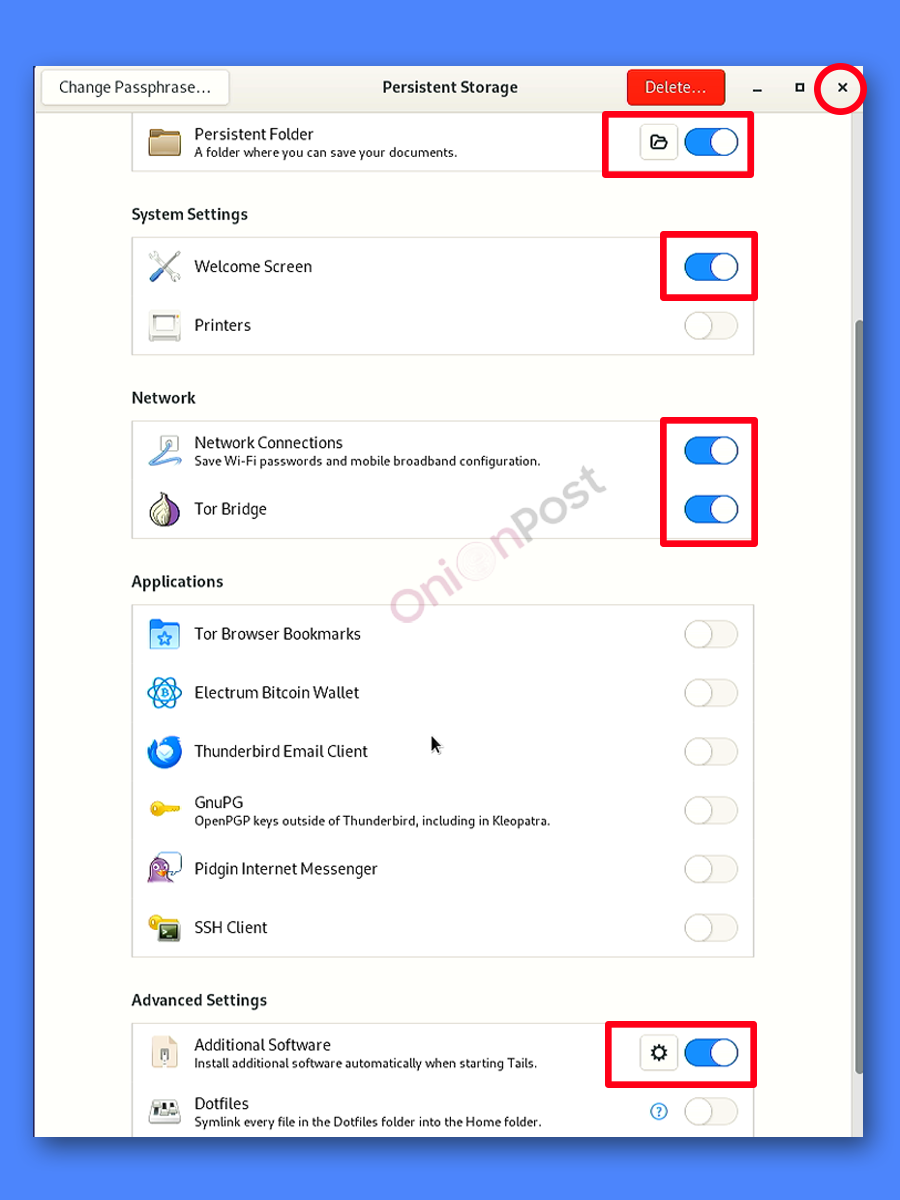
Launch Tails. Persistent Folder and Additional Software must be enabled, the rest is optional:
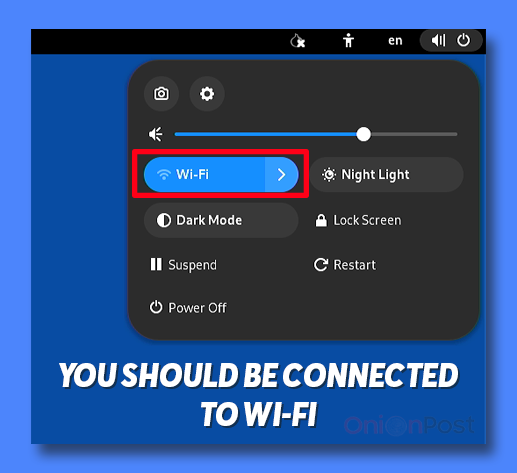
Then connect to the Internet (via Wi-Fi, Ethernet, or LTE modem).
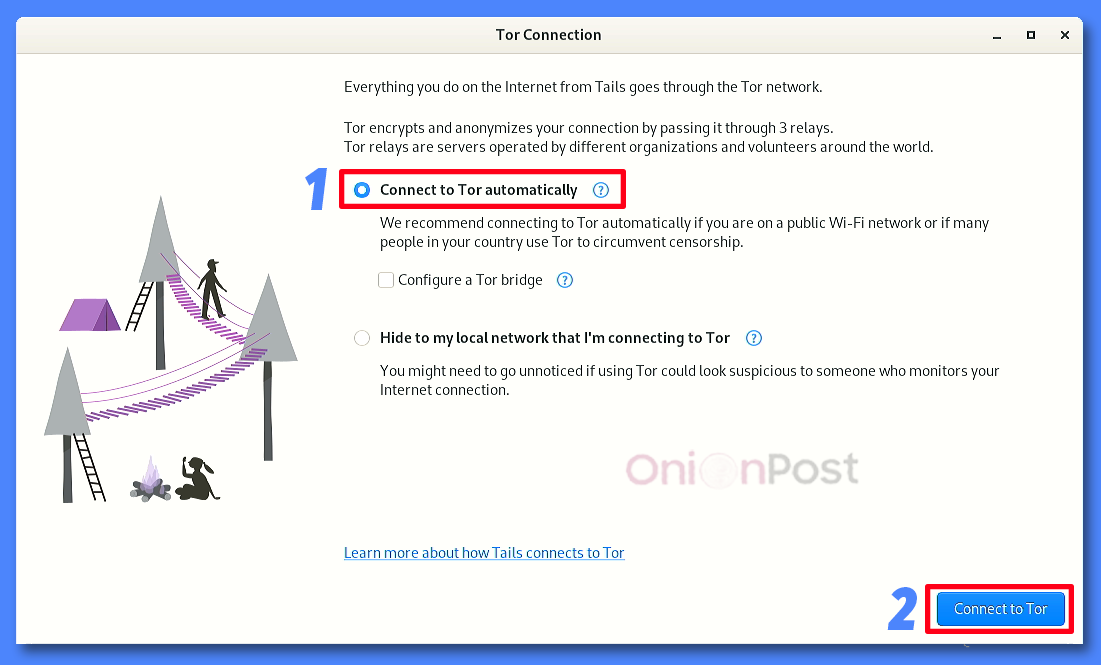
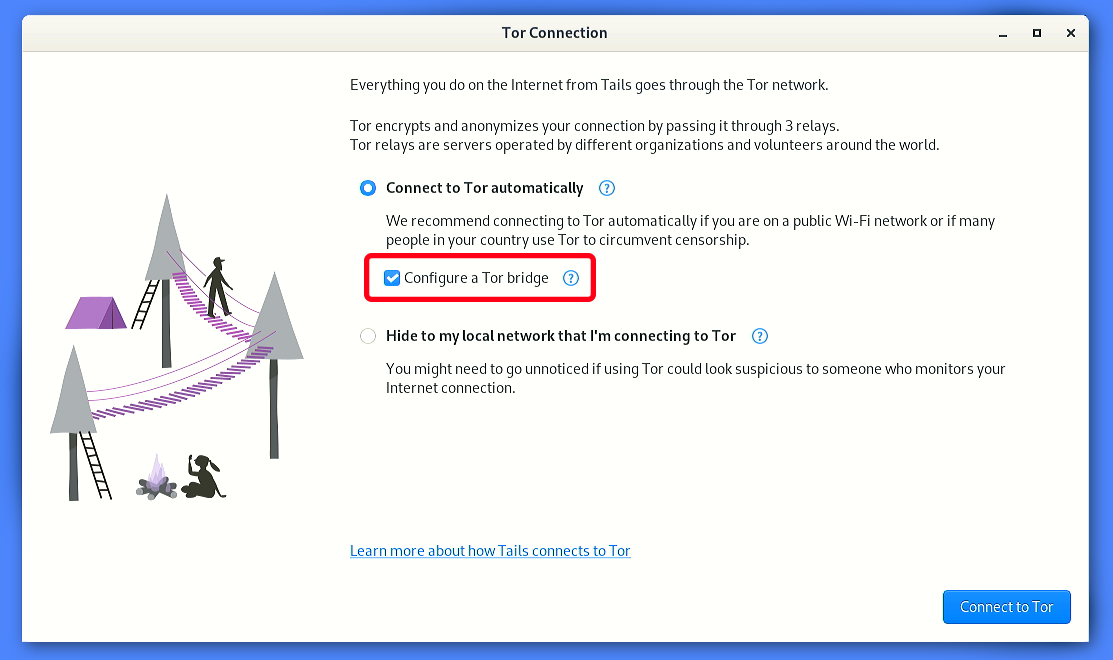
In the “Connect to Tor” window, check “Automatically connect to Tor” and click “Connect to Tor”.
!NB
Using “Connect to Tor automatically” (with or without “Configure a Tor bridge”) will tell your ISP that you are using the Tor network.
To hide this, you should select the option below ("Hide to my local network ...") and input non-public bridges which you have to get in advance. In this case, in search for bridges you should not use:
- the Unsafe Browser on the same OS Tails;
- devices associated with your identity;
- networks associated with your identity or your Tor activity.
If you cannot connect to the Tor network,
then reconnect the Internet.
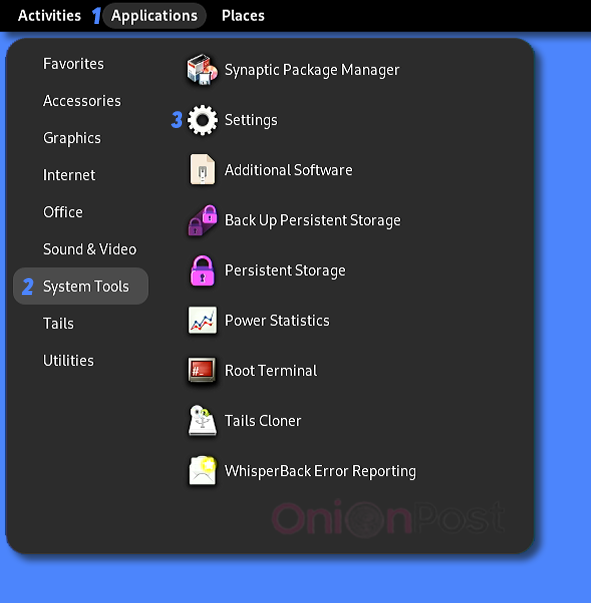
Check that the system time and date are set correctly. They are displayed at the top of the desktop (UTC+0 by default). Set them manually in Applications => System Tools => Settings.
Enter the admin password
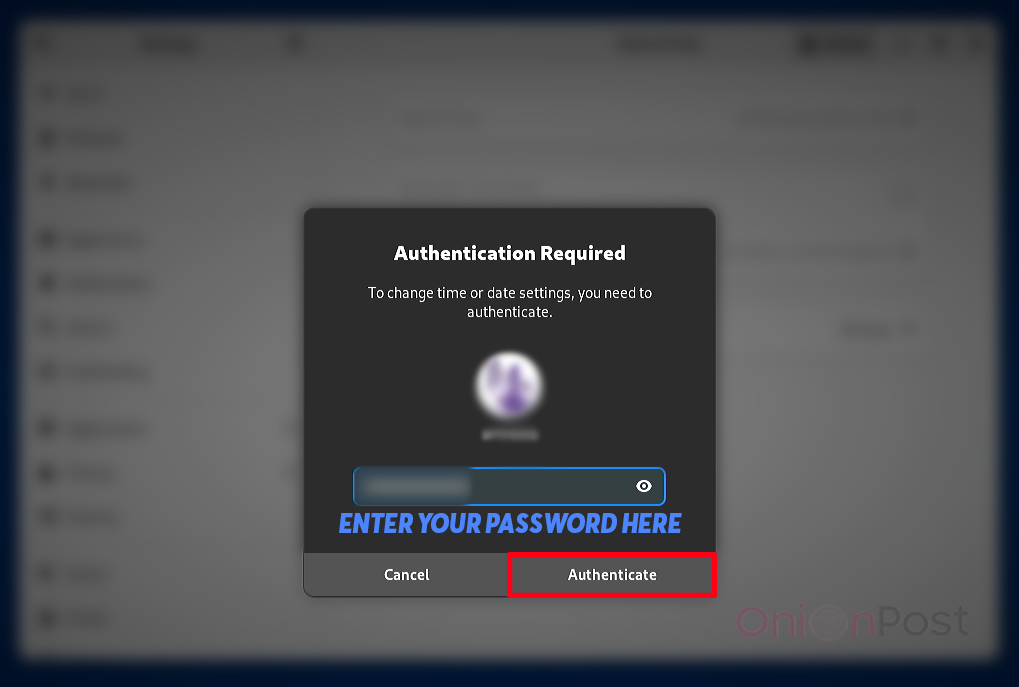
Set time zone to UTC+0 and set correct date and time (precision within few minutes is fine).
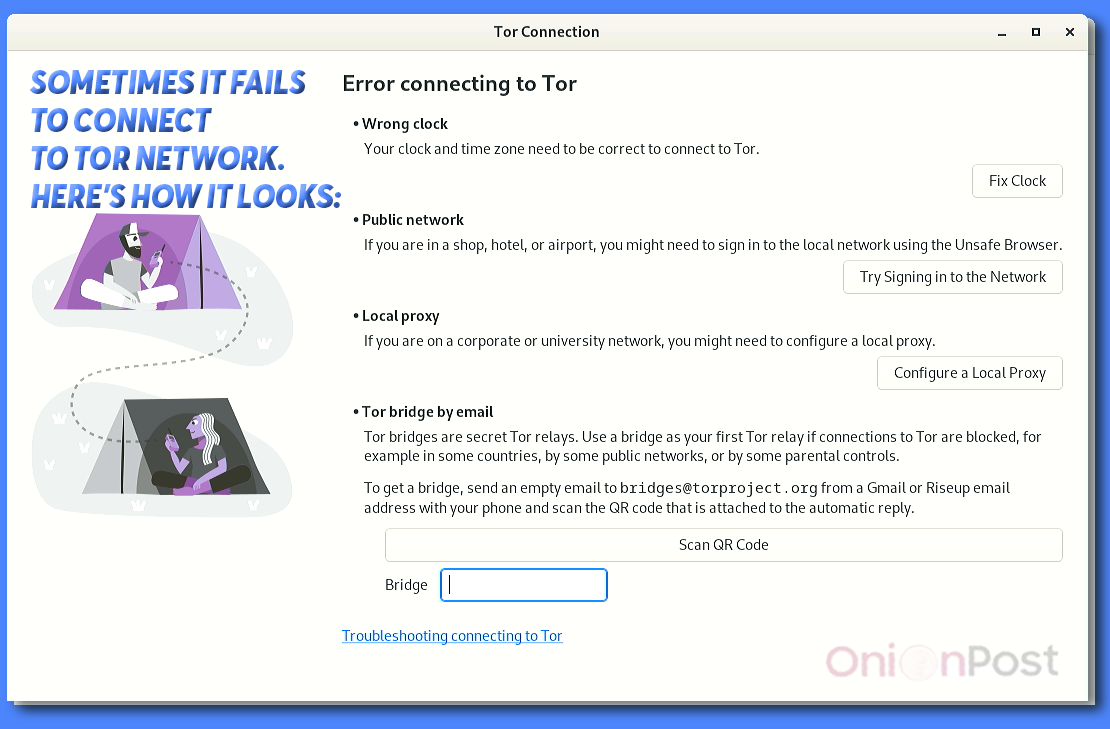
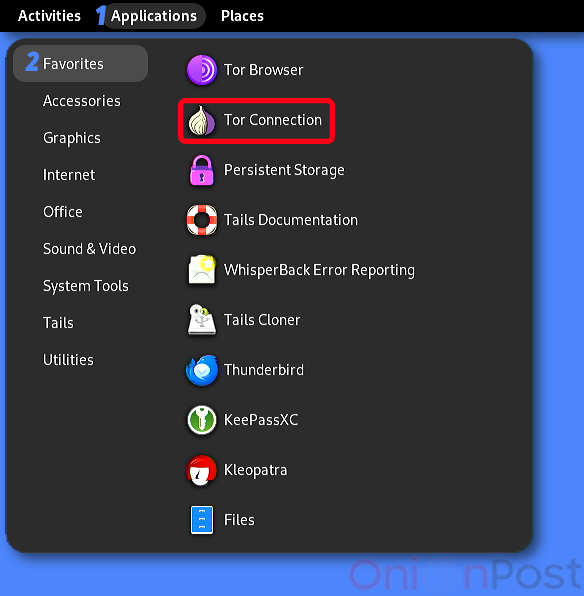
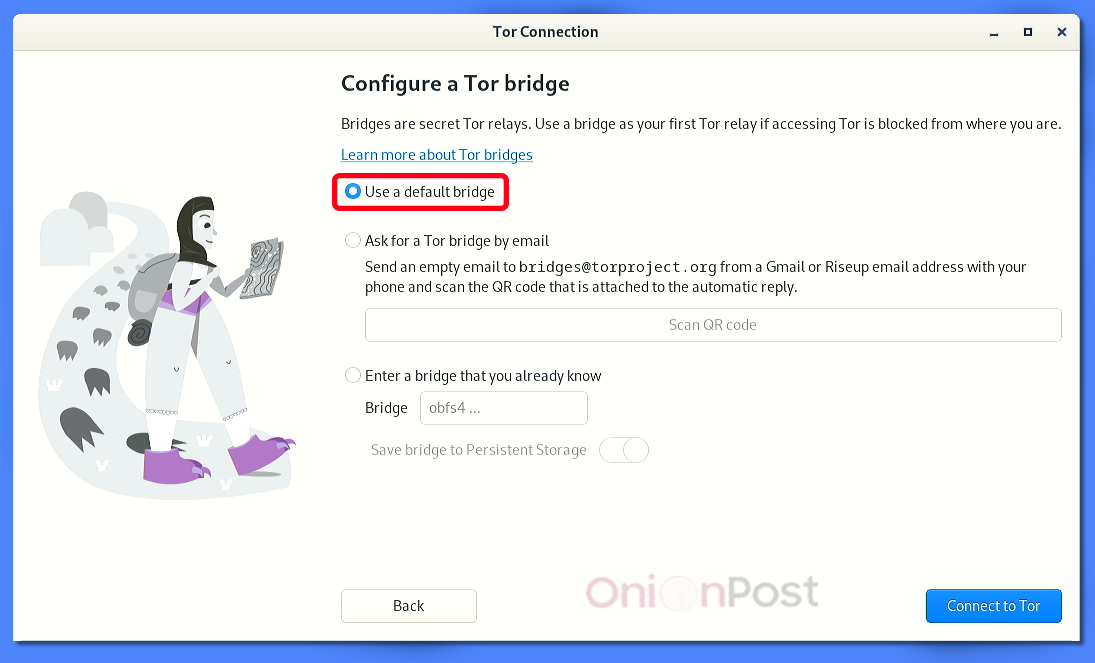
If this does not help, go back to Applications => Internet => Tor Connection. Enable “Configure a Tor bridge” and “Use a default bridge”.
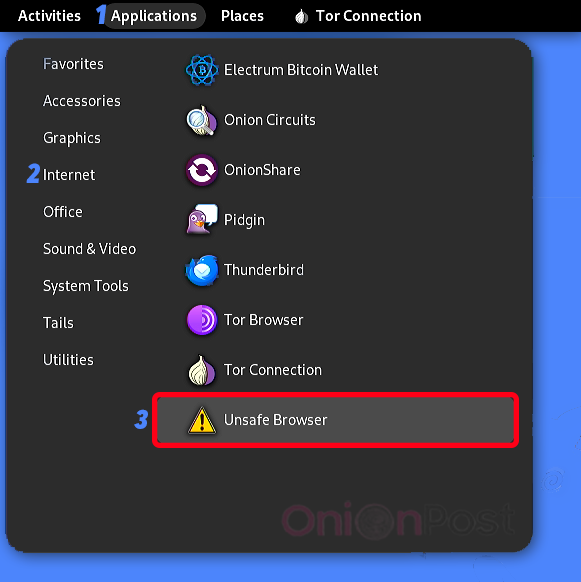
If that still doesn’t help, you’ll need to get the bridges from the official site https://bridges.torproject.org/.
This can be done via Applications => Internet => Unsafe Browser.
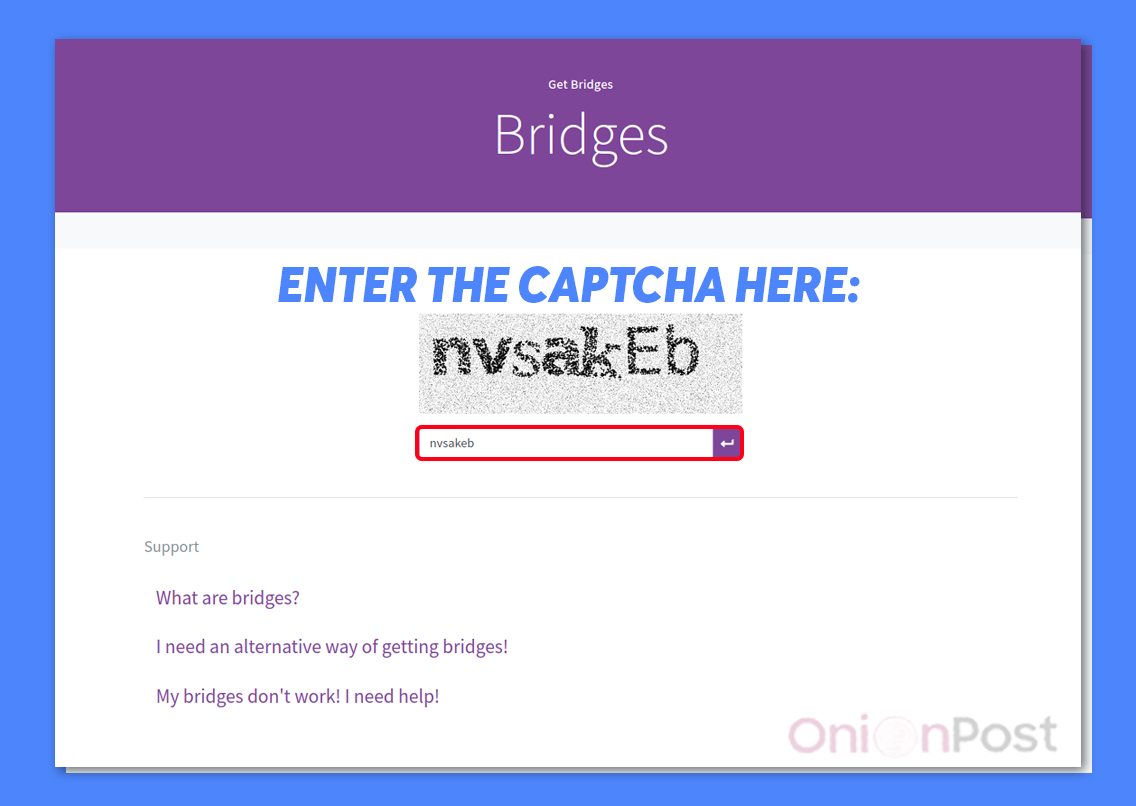
Getting the bridges
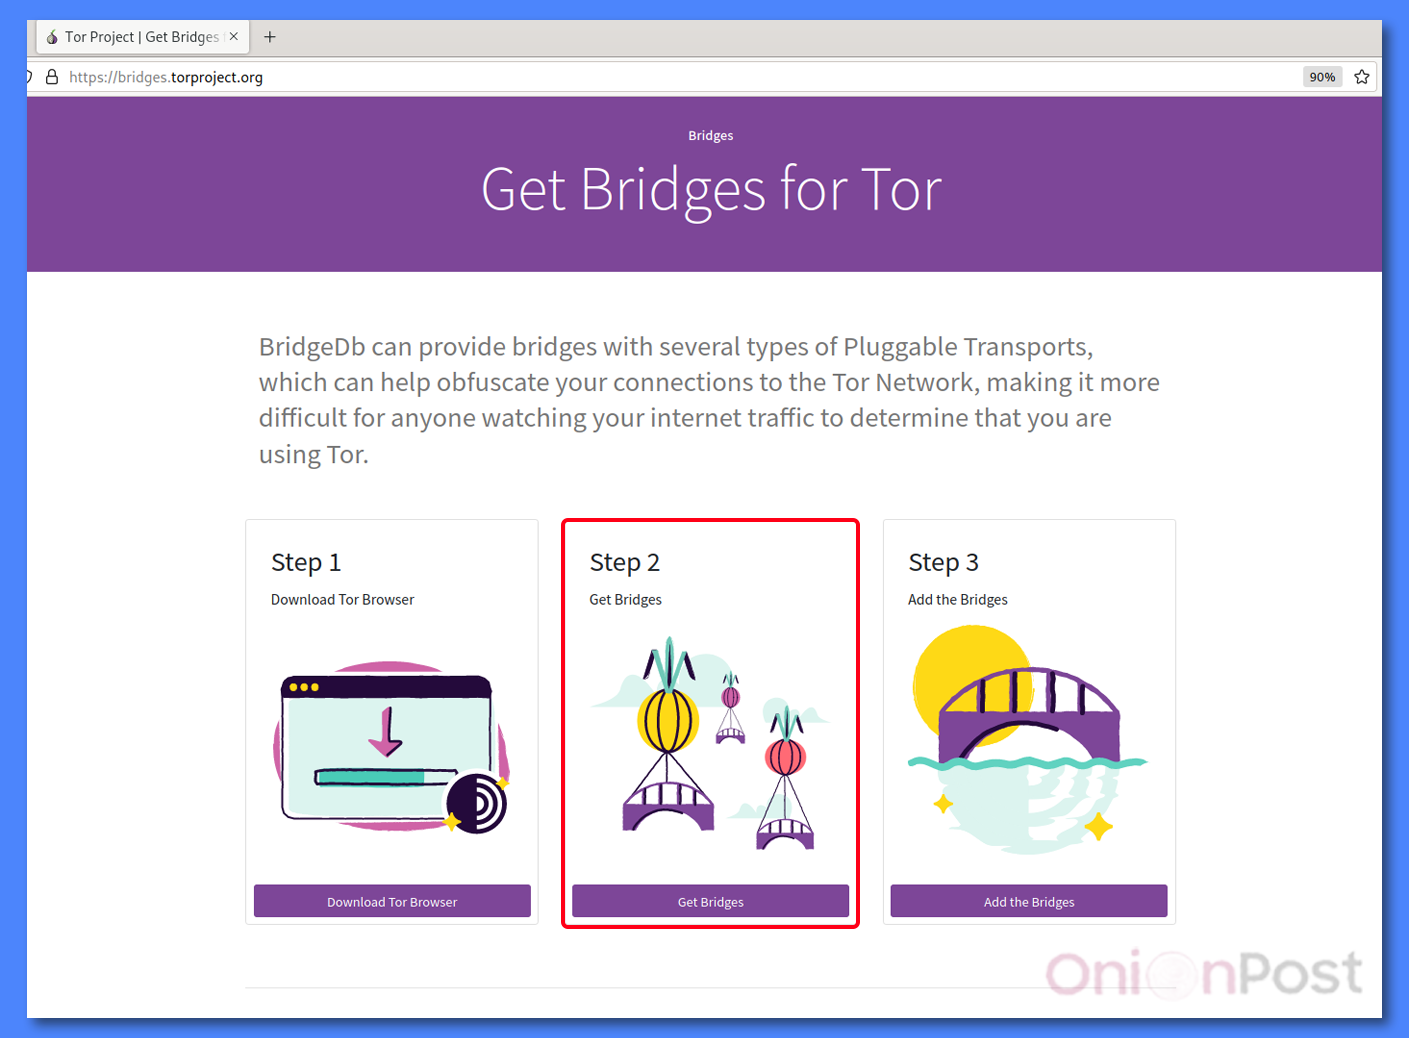
“Just give me bridges”
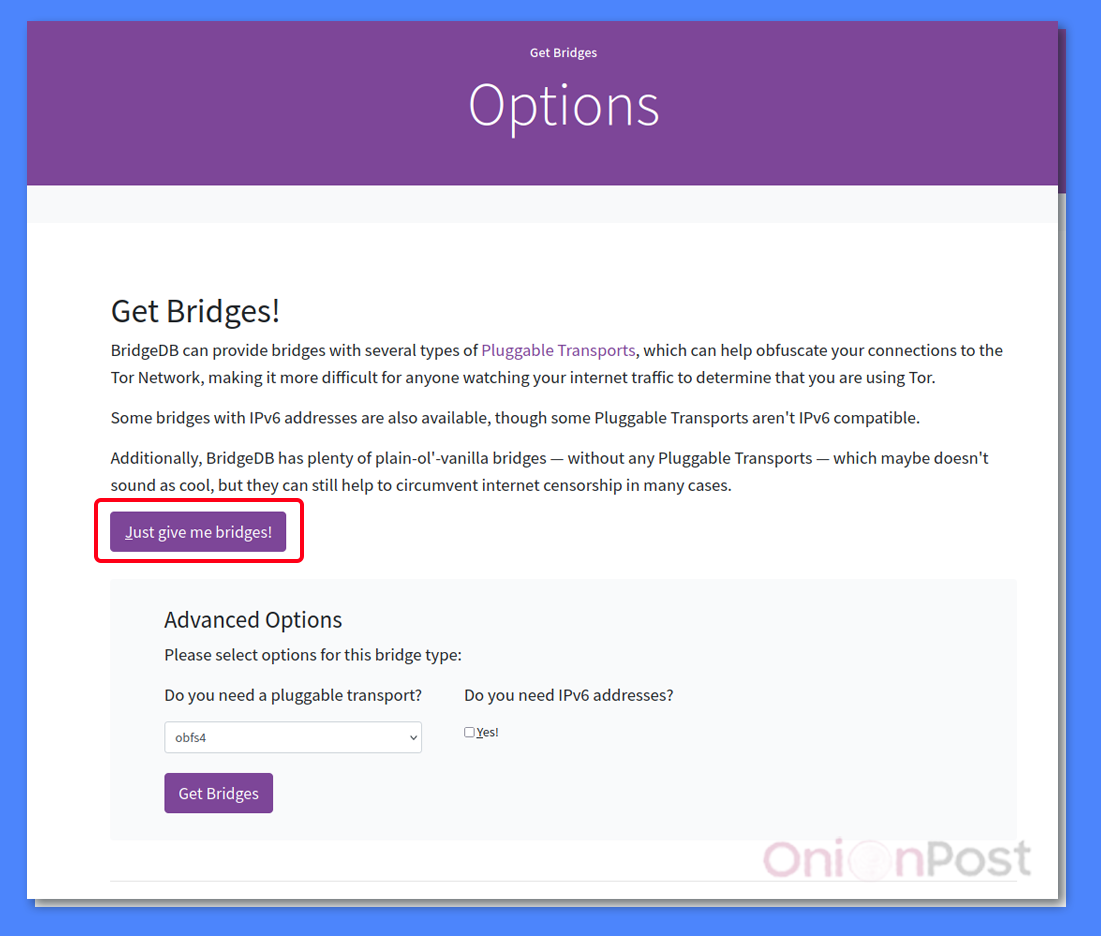
Enter the captcha, save a couple bridges. Enter one of them in the “Error connecting to Tor” window.
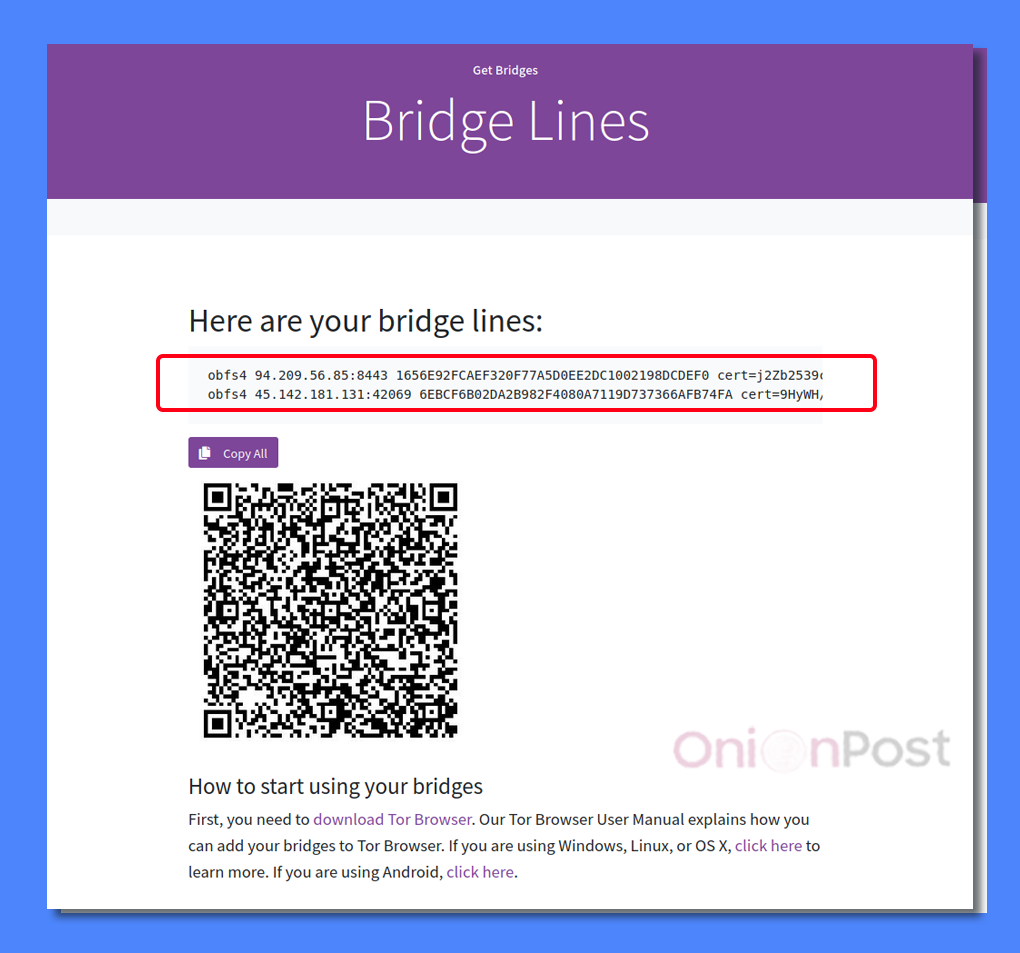
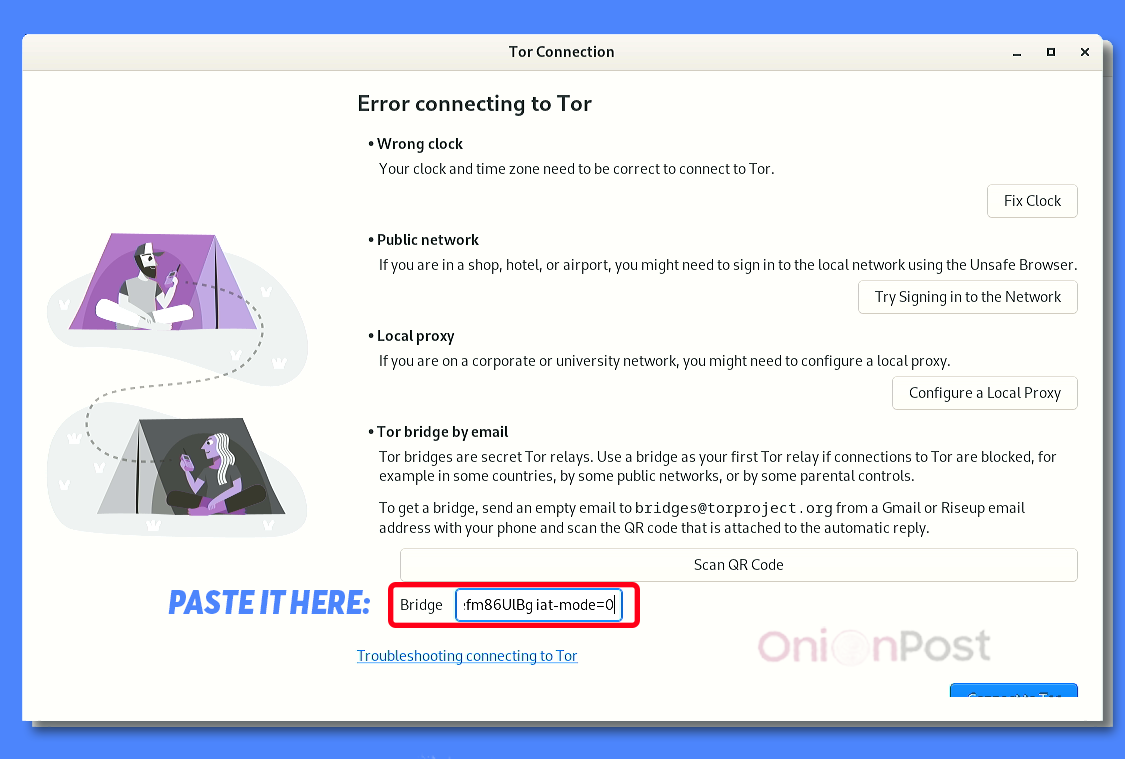
Or in the “Enter a bridge you already know” window.
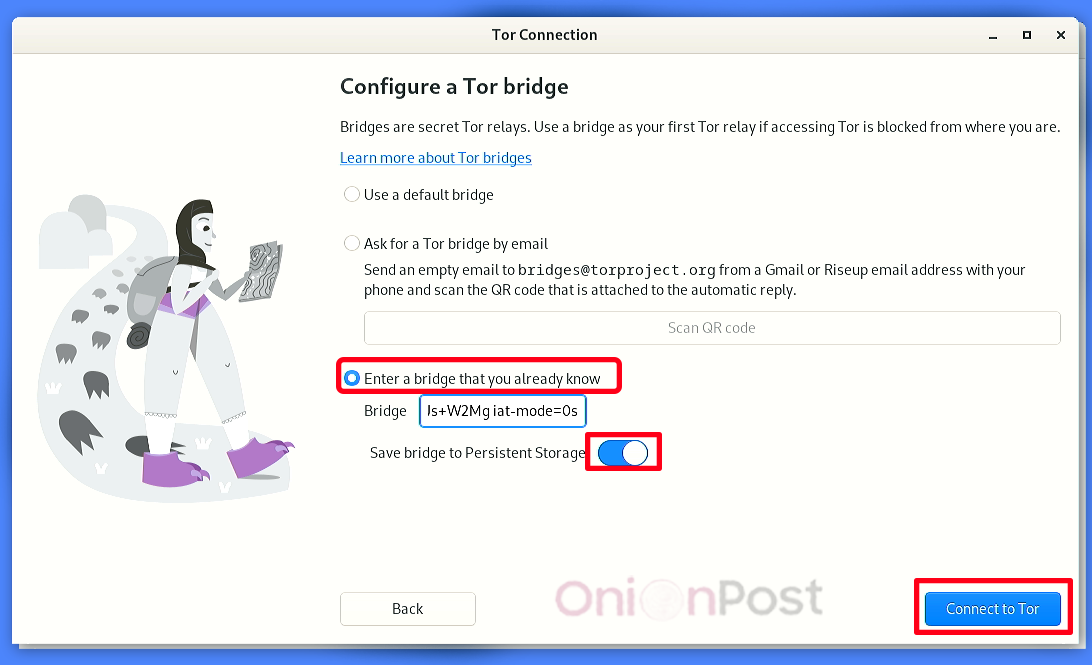
Some bridges may not work or may be slow, so it is better to save several at once and try them one by one.
!NB
Normally, the Unsafe Browser is only needed to connect to the Wi-Fi that requires login via a captive portal. Getting bridges with Unsafe Browser is acceptable, but not ideal in terms of security, as ISPs will know that your IP address made a request to bridges.torproject.org.
You can get bridges through another device and transfer them to your OS Tails.
Now Tails is ready for the Monero GUI wallet installation.
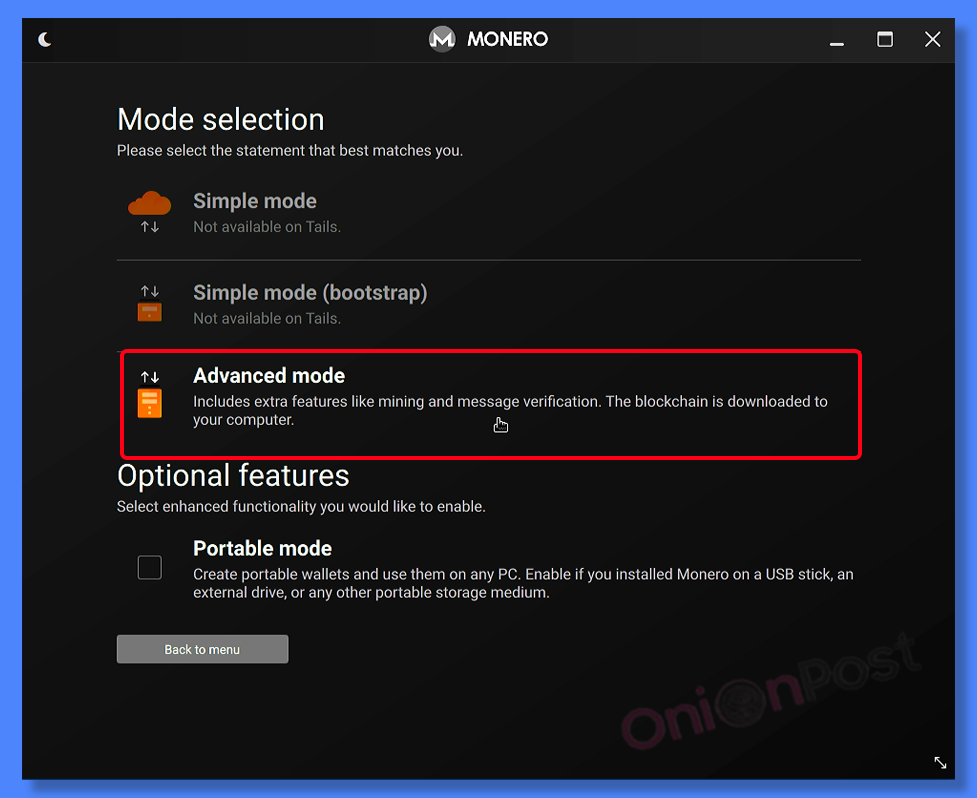
Install and use the Monero GUI Wallet
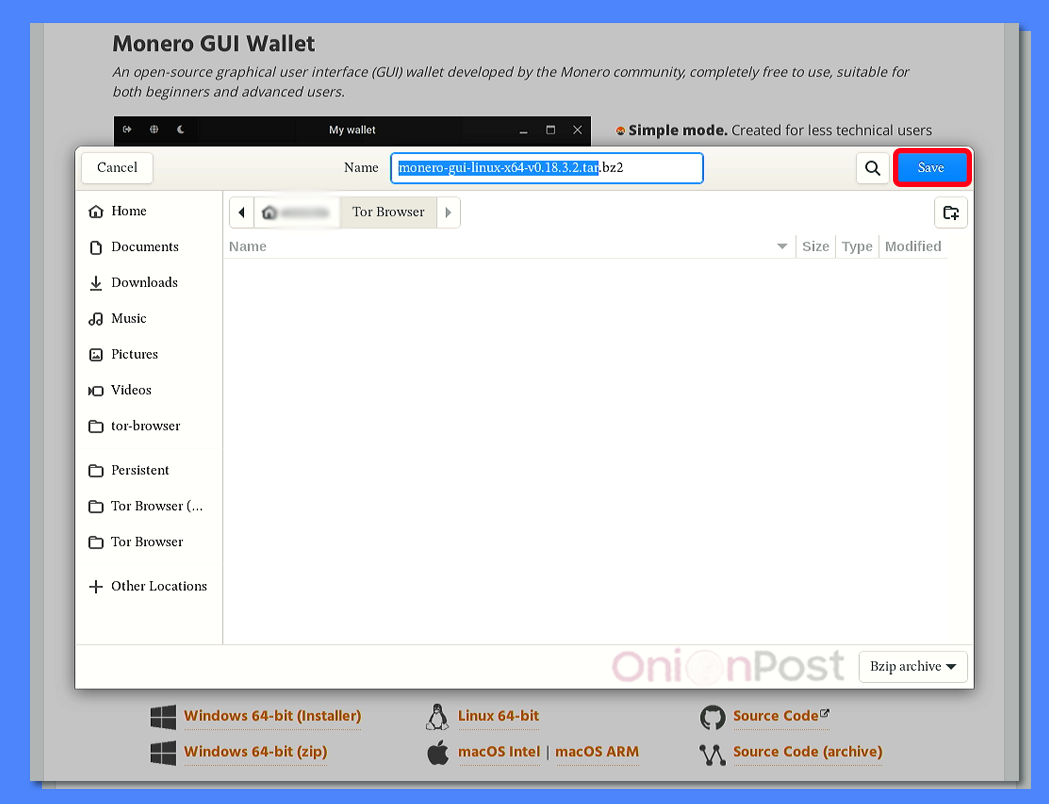
https://www.getmonero.org/downloads/ => Download the Monero GUI Wallet for Linux 64-bit

It’s in the Tor Browser folder by default

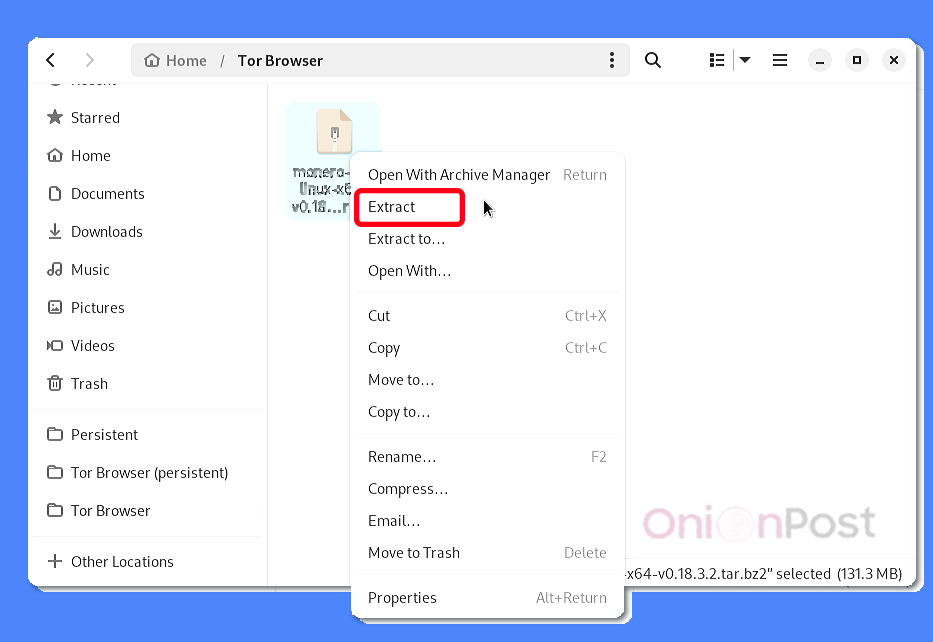
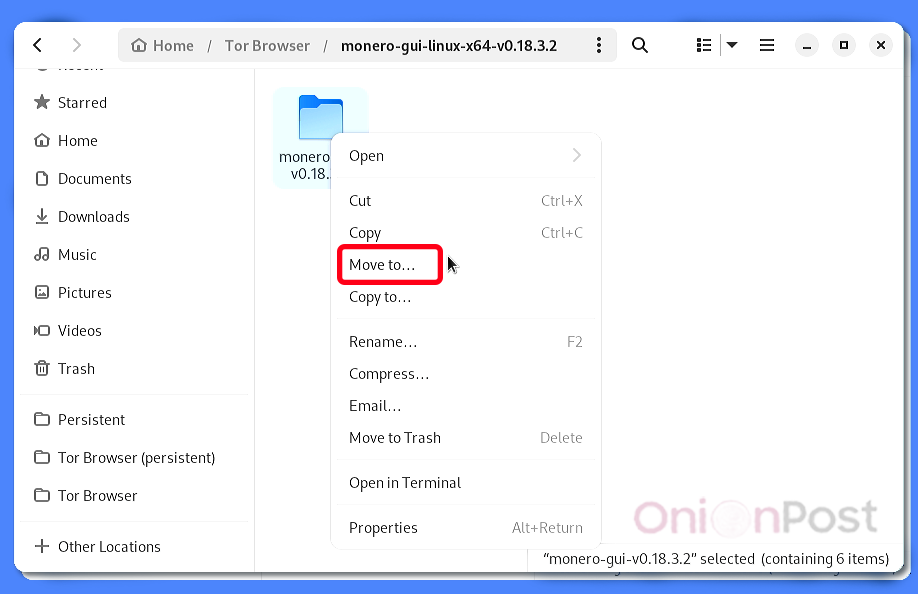
In the Tor Browser folder, right-click on the downloaded file => Extract
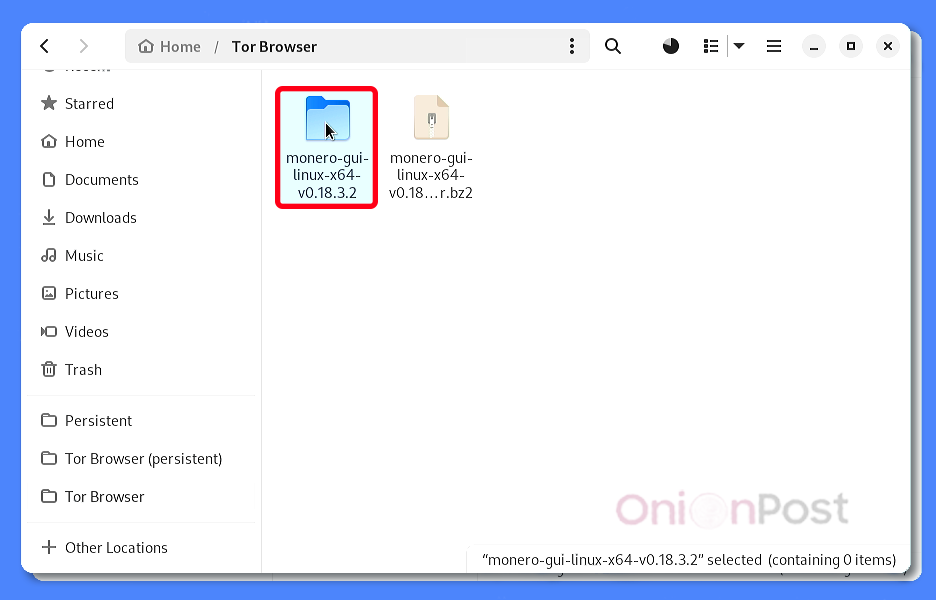
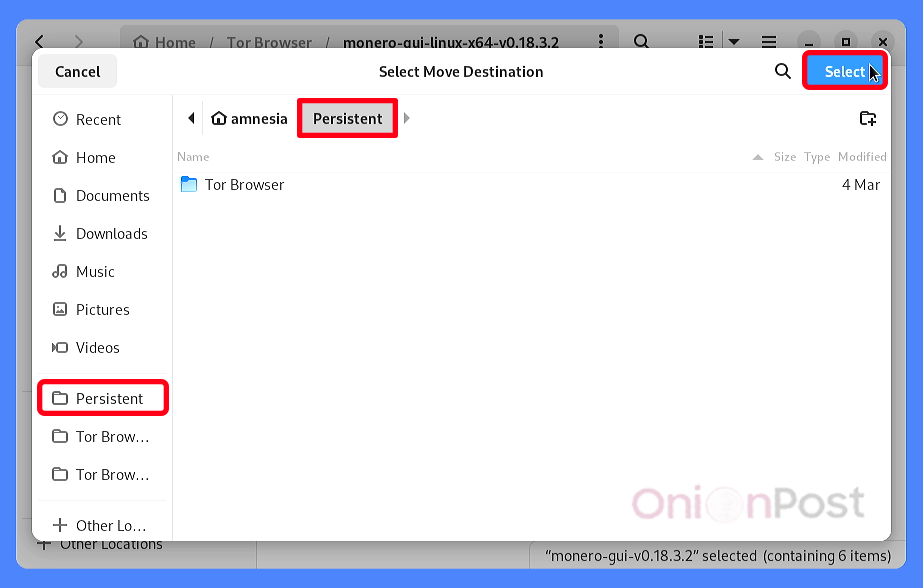
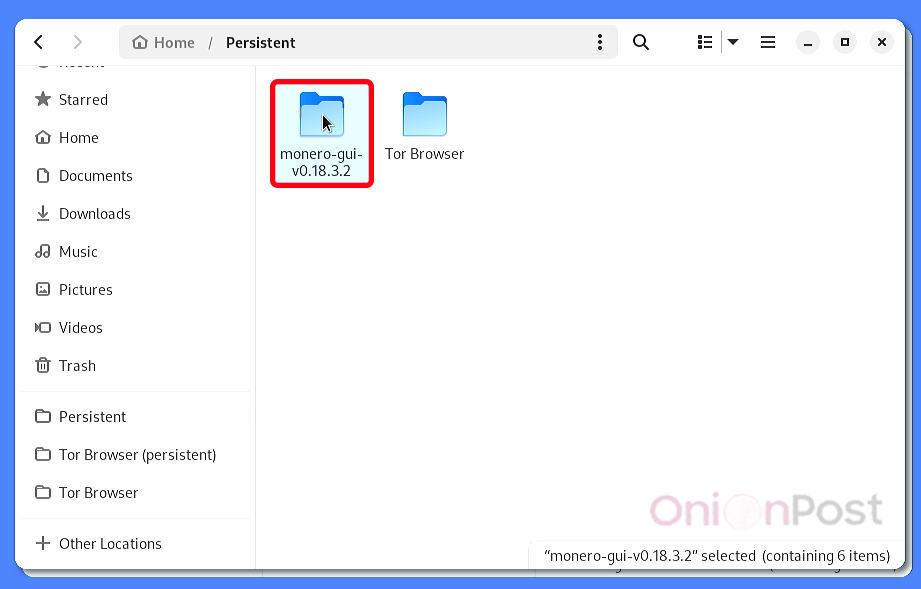
Go to a created folder and move the monero-gui-vx.xx.x.x.x folder to the Persistent
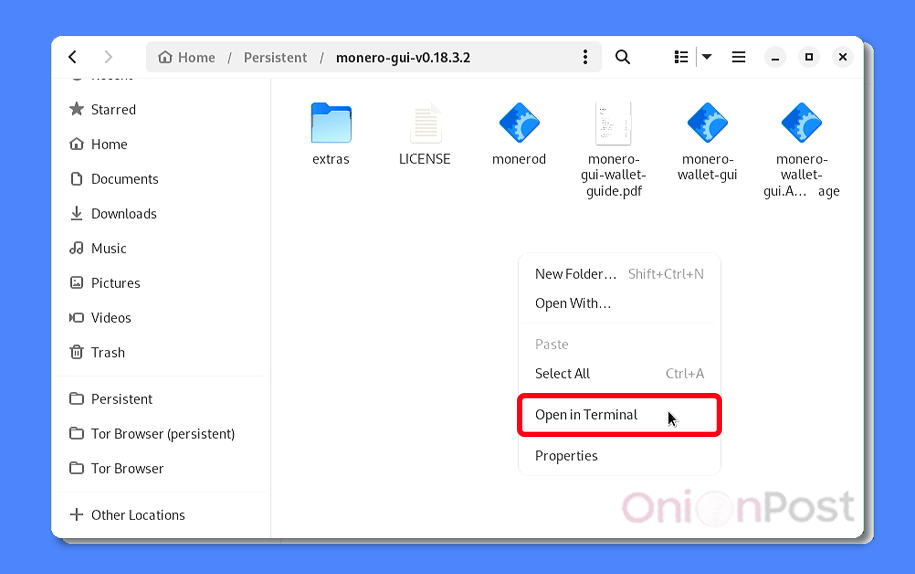
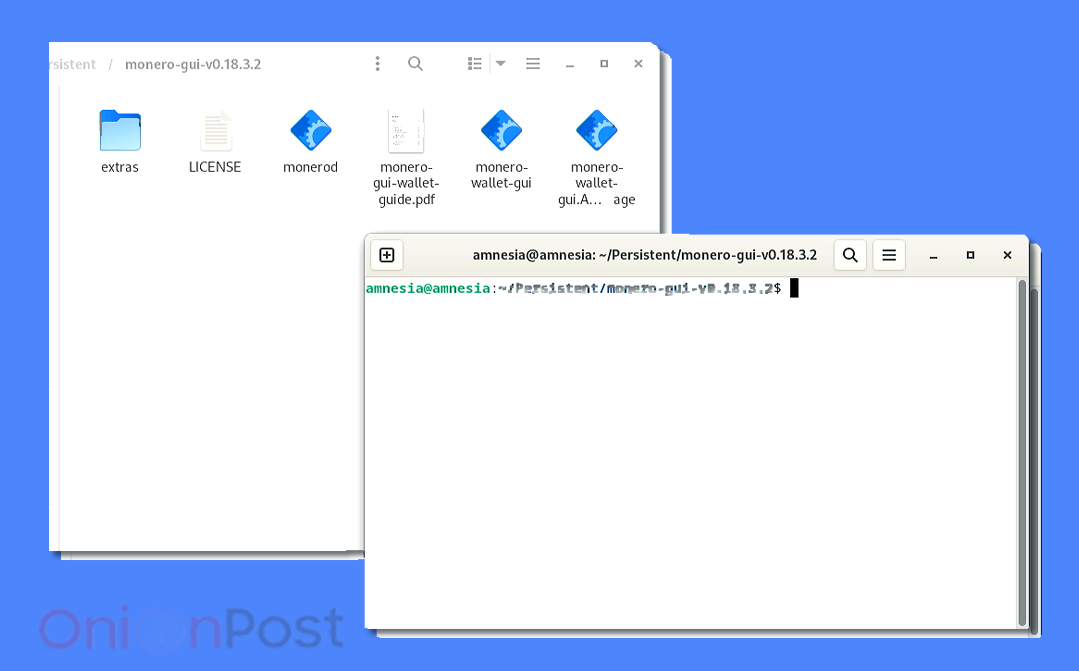
Go to the monero-gui-vx.xx.xx.x.x folder, right click on the free space => Open in Terminal
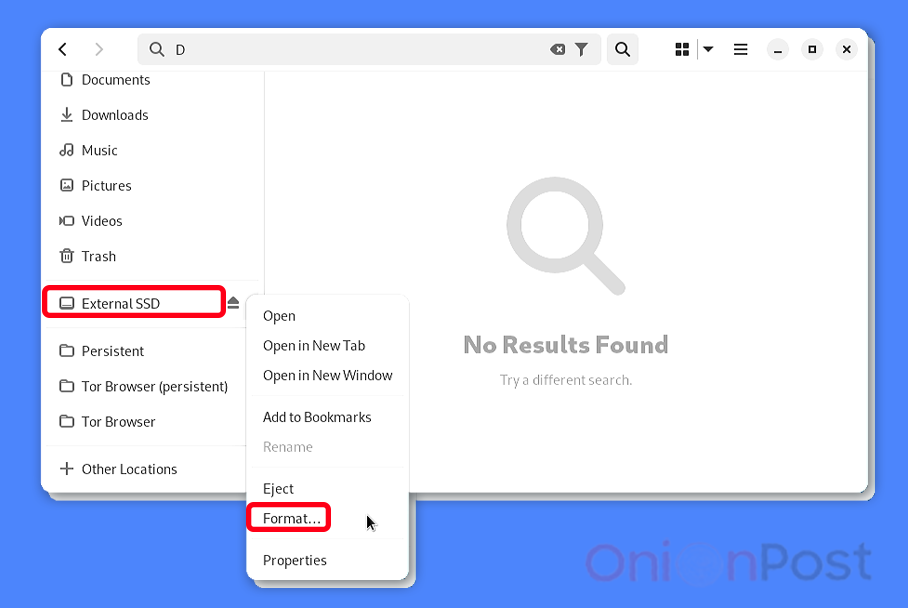
In Explorer, right click on the drive => Format.
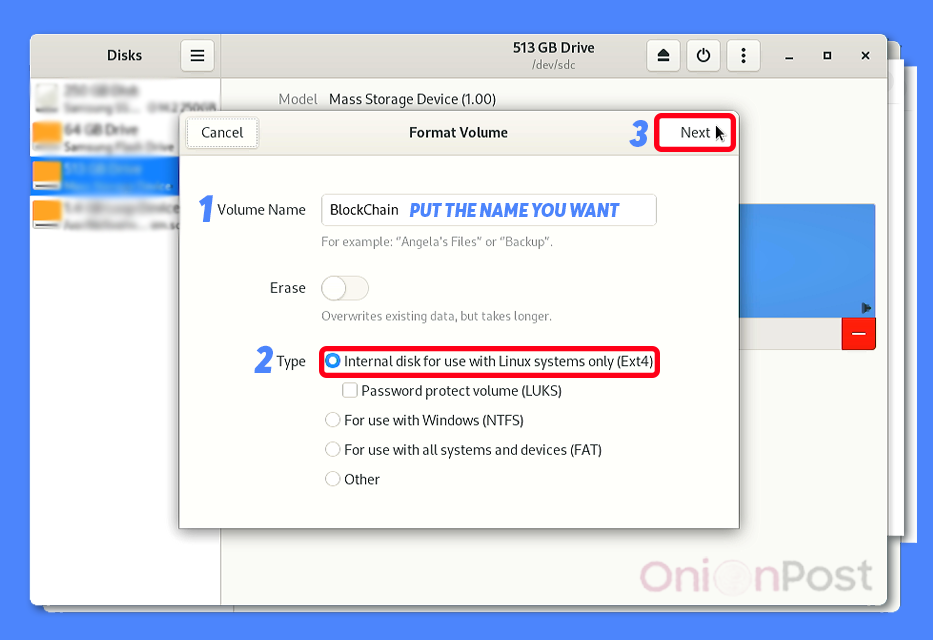
Enter any new name for the disc, select Ext4 format, click ‘Next’ and ‘Format’.
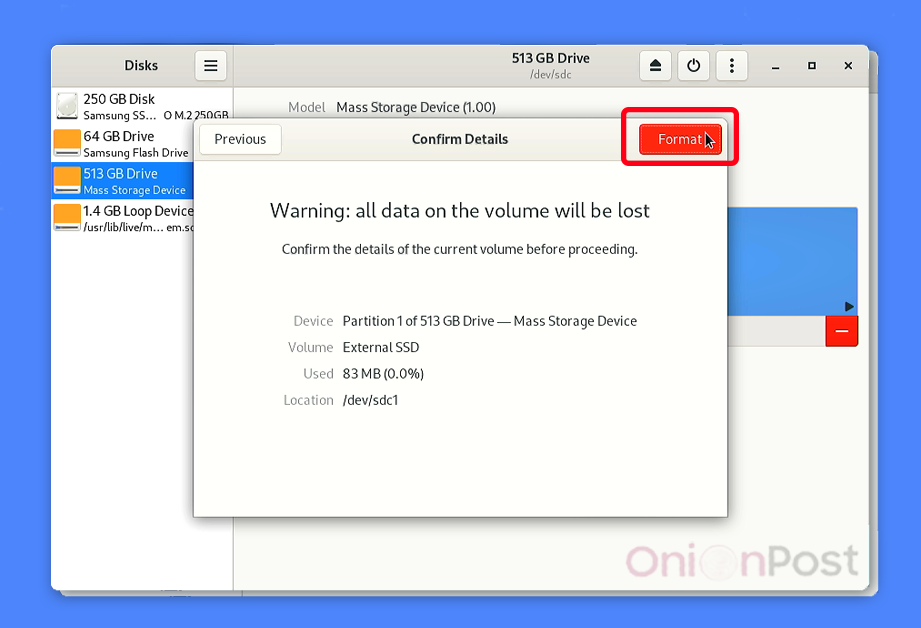
Wait for formatting to complete. Close ‘Devices’.
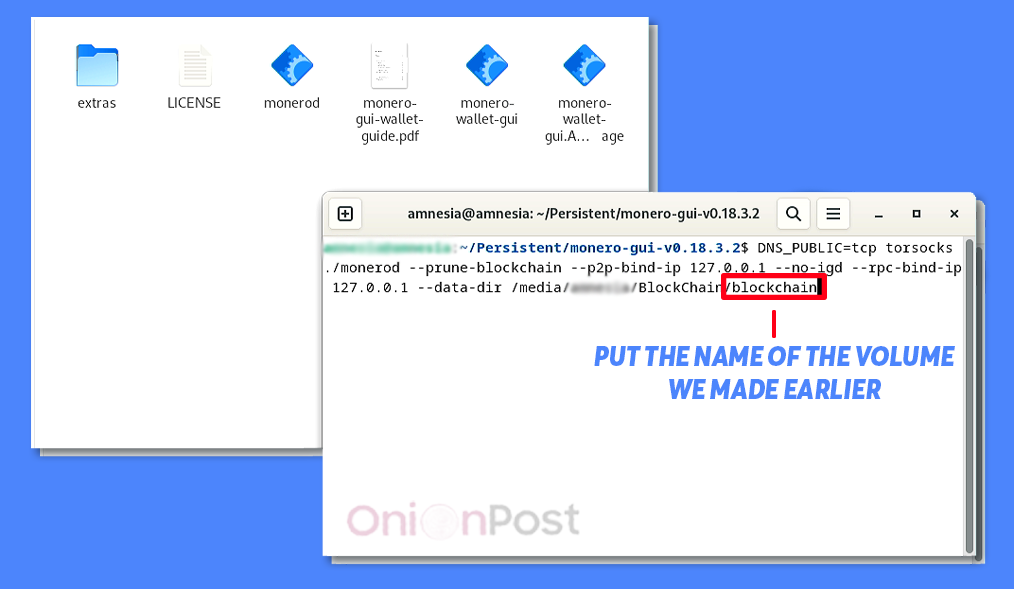
Switch to the Terminal you opened earlier and type the following command:
DNS_PUBLIC=tcp torsocks ./monerod --p2p-bind-ip 127.0.0.1 --no-igd --rpc-bind-ip 127.0.0.1 --data-dir /media/amnesia/NAME_of_your_SSD/blockchain
“NAME_of_your_SSD” is the name of the blockchain storage.
This will create a folder for the blockchain on that storage
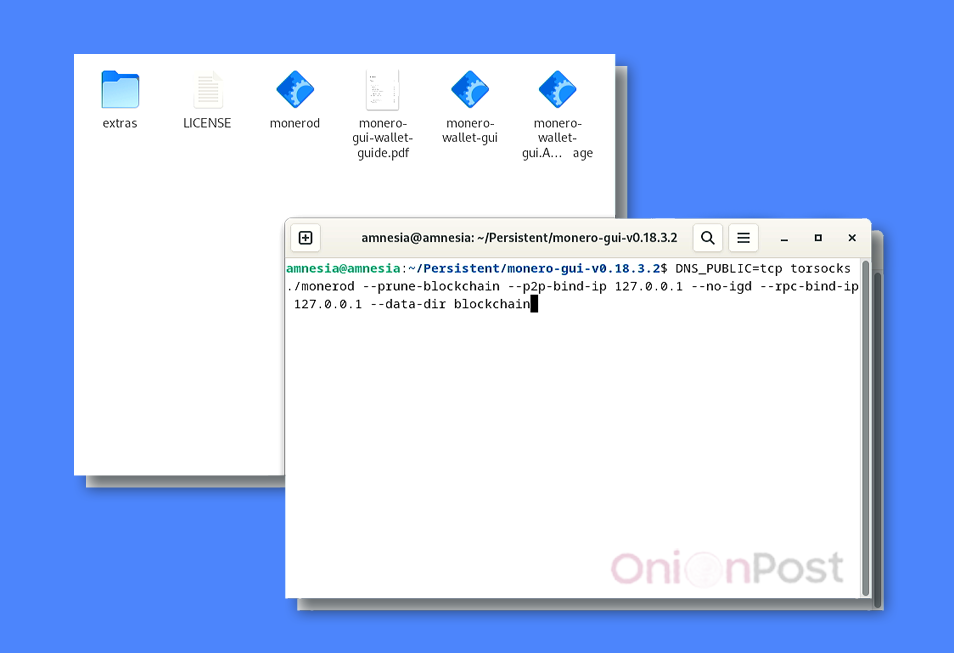
If the blockchain is going to be stored on the same storage that has Tails on it, type this in Terminal:
DNS_PUBLIC=tcp torsocks ./monerod --p2p-bind-ip 127.0.0.1 --no-igd --rpc-bind-ip 127.0.0.1 --data-dir blockchain
The blockchain folder is automatically created in the monero-gui folder
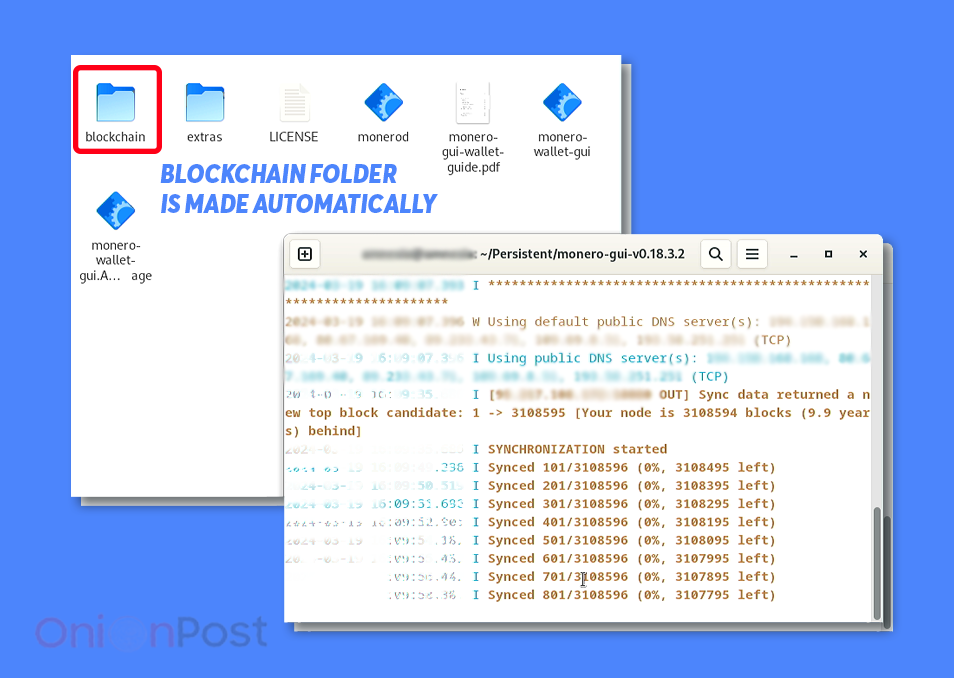
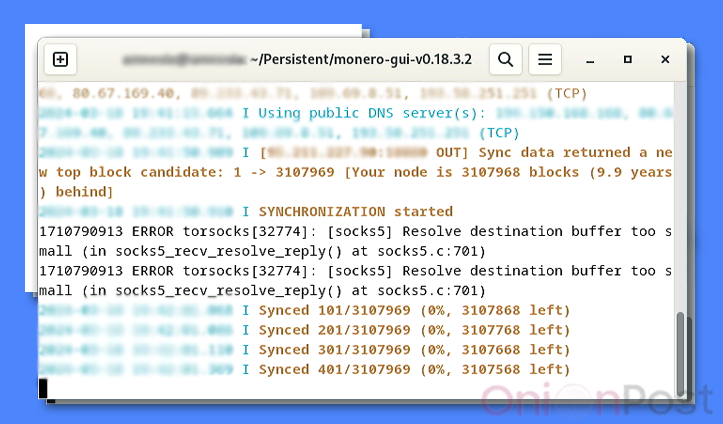
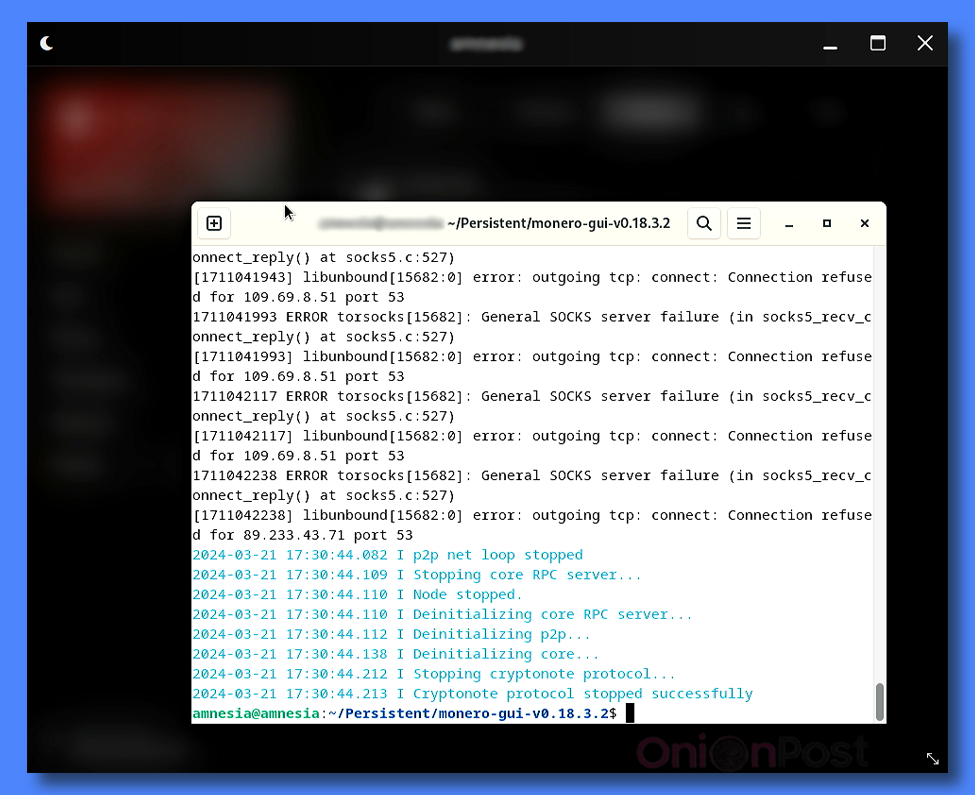
The blockchain download has started. On average, it takes 3-10 days, depending on Internet and the Tor network speed in your country.
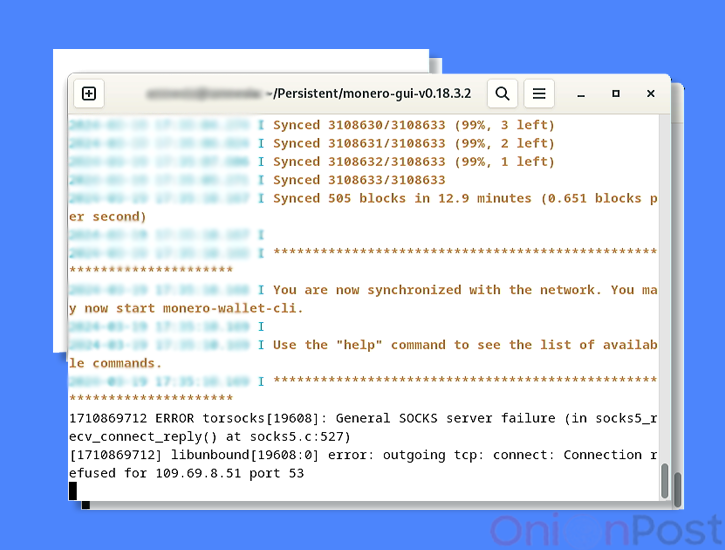
The “ERROR torsocks” messages are related to the peculiarities of Tor’s traffic routing. Do not pay attention to them.
Incorrectly shutting down Terminal with Monero daemon (background Wallet process) can damage the integrity of the blockchain file. It is highly undesirable to shut down your computer, or even close Terminal without first pressing CTRL+C. This may cause the Terminal to return an error instead of continuing to load the blockchain. There are quite a few possible error messages, e.g. “Bus error”:
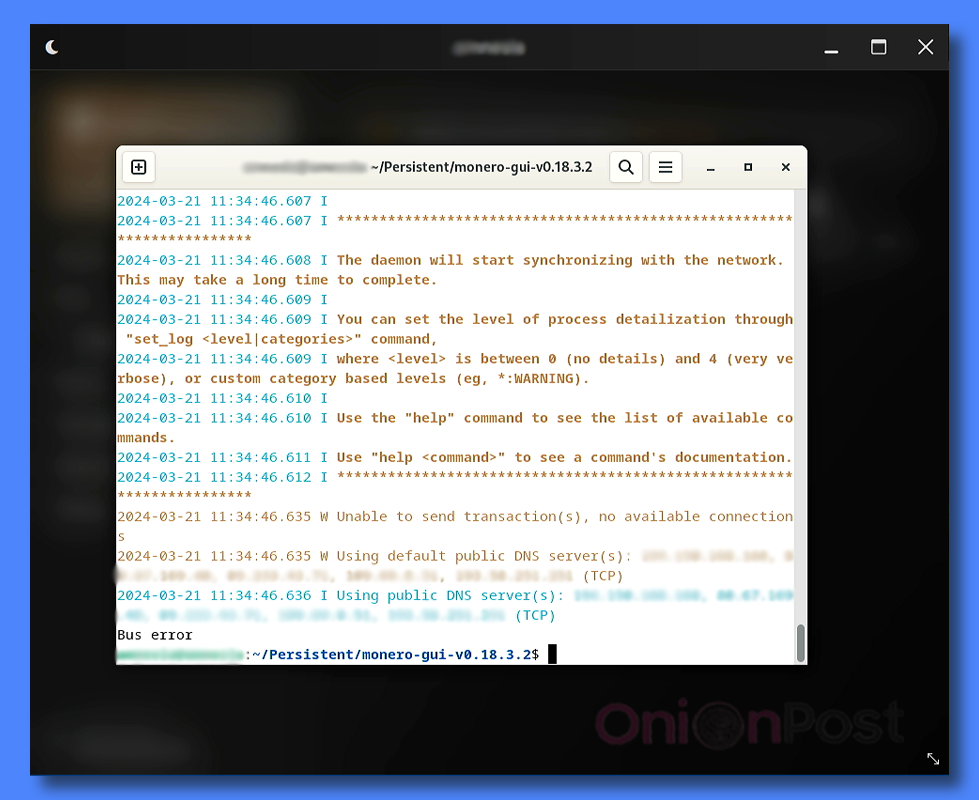
If this happens and rebooting does not help, you will need to download the blockchain again.
By the way, saving a back up of the blockchain might be a good idea.
!NB
If you need to pause the download process for any reason or shut the process down, follow the correct procedure described below in Appendix #1
The Terminal will notify you when the download is complete:
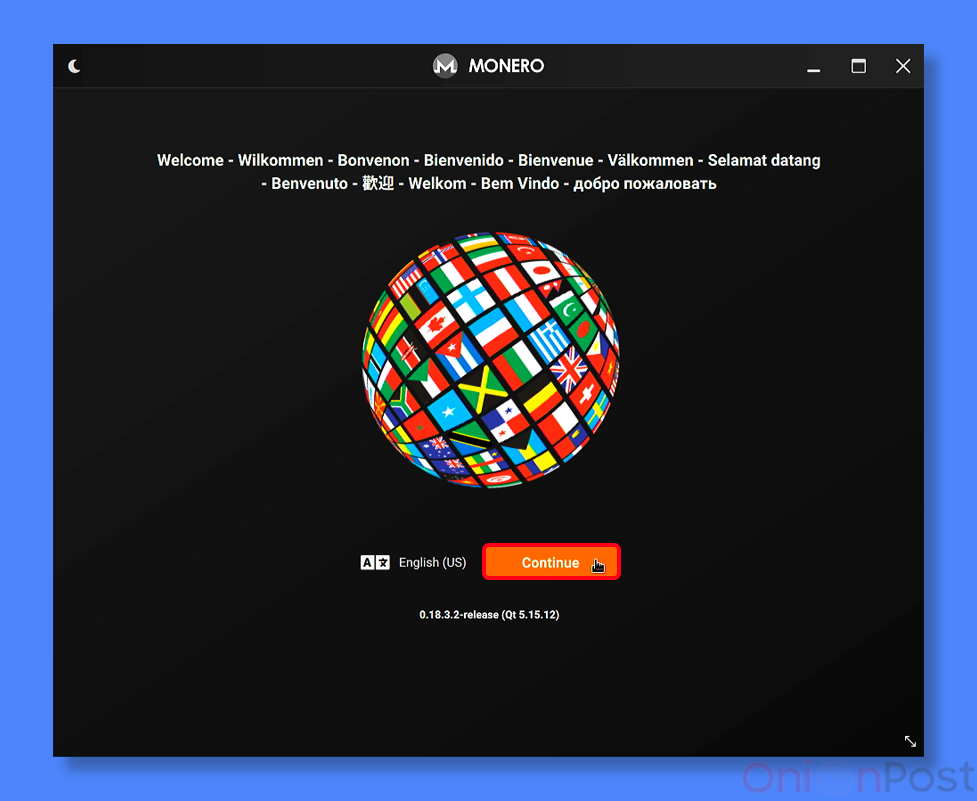
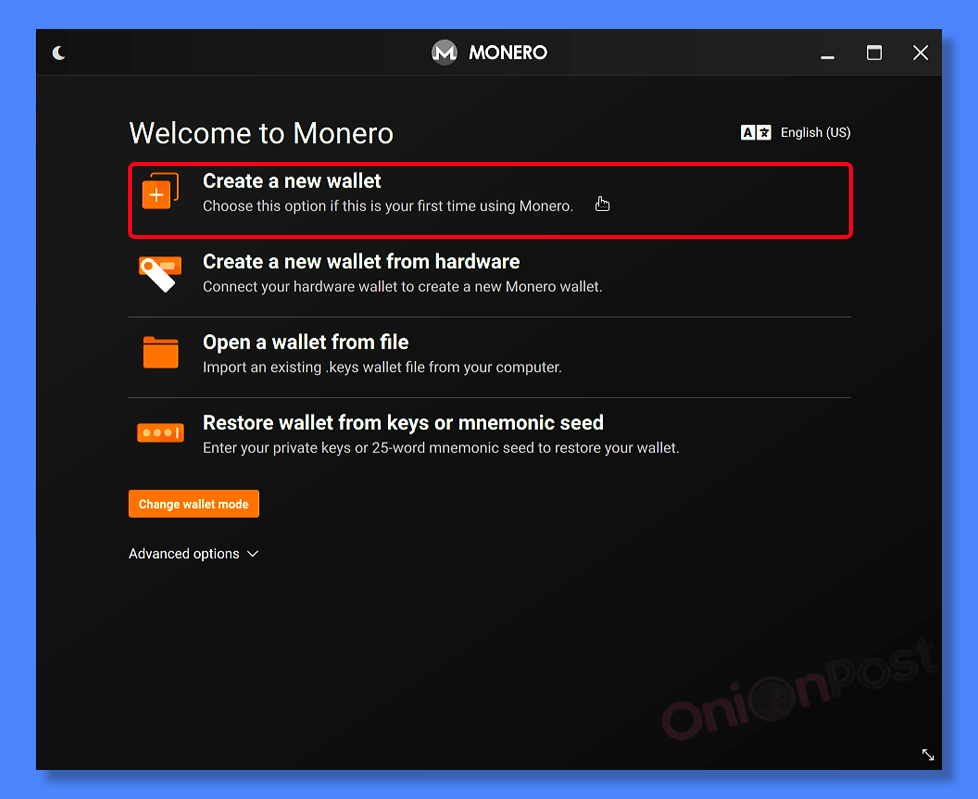
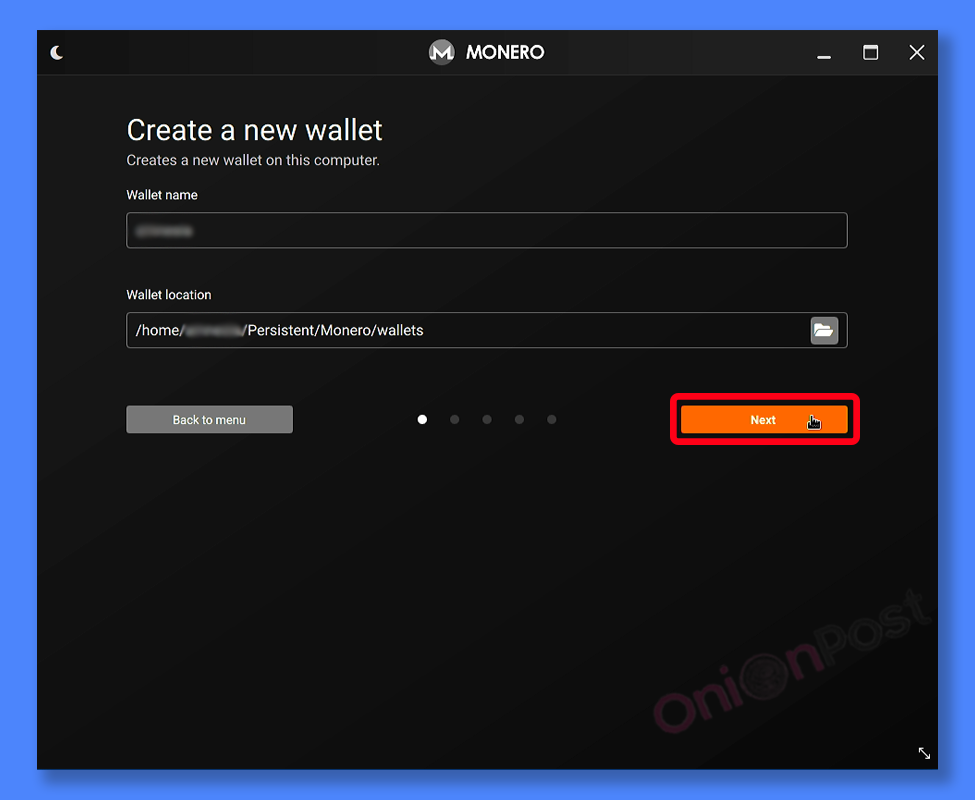
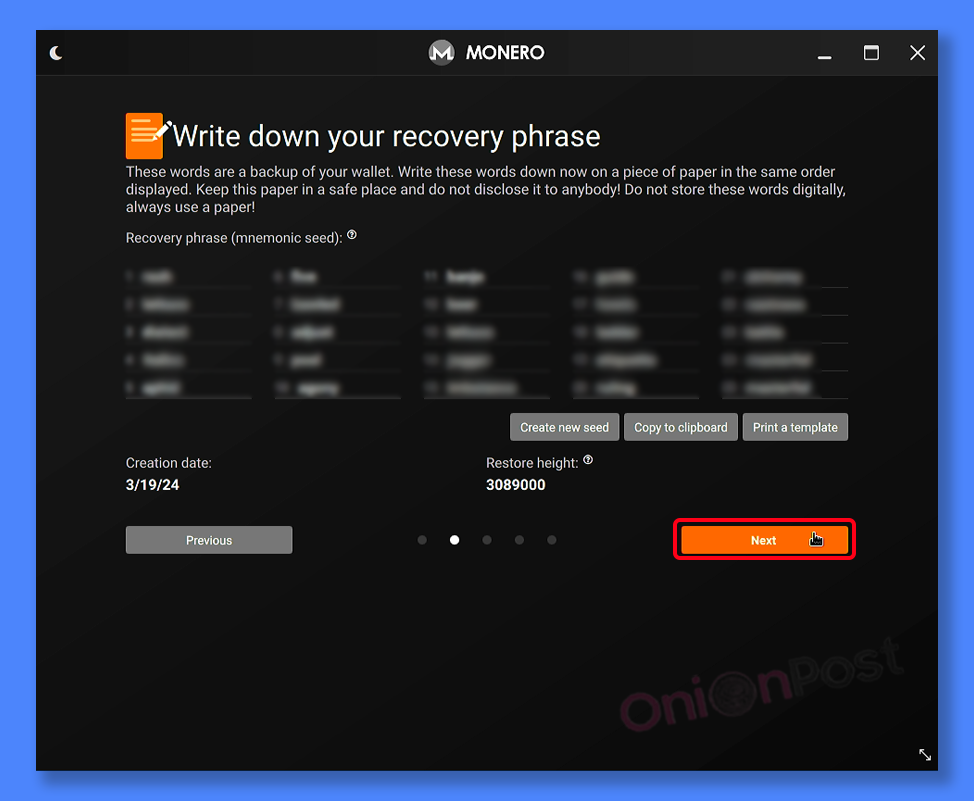
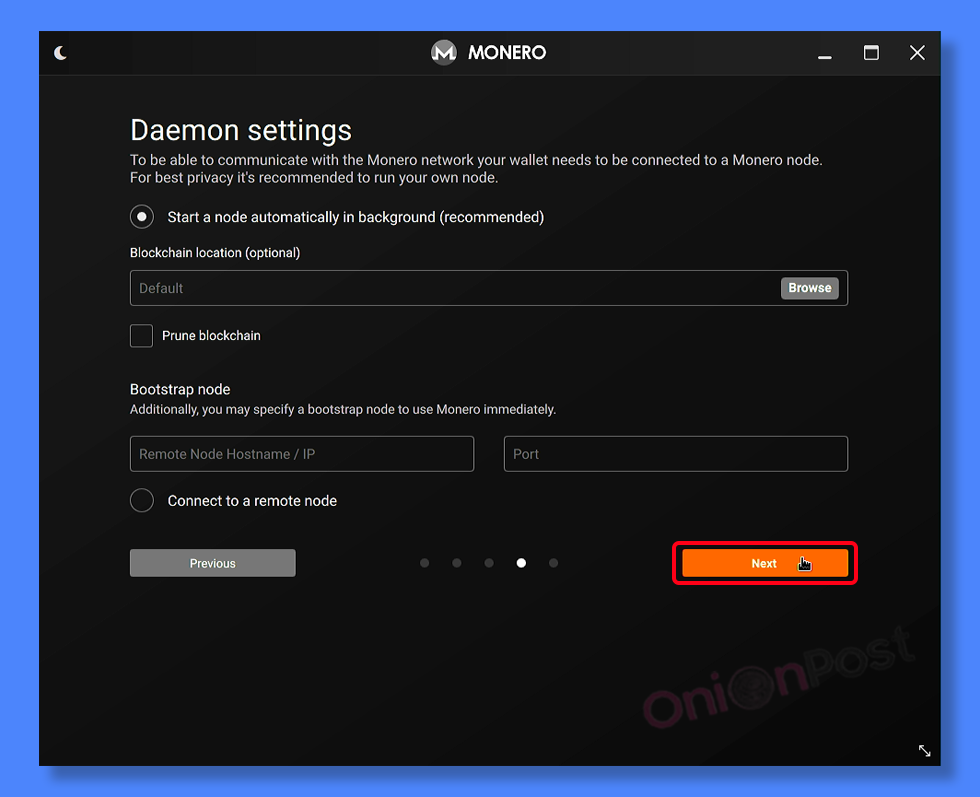
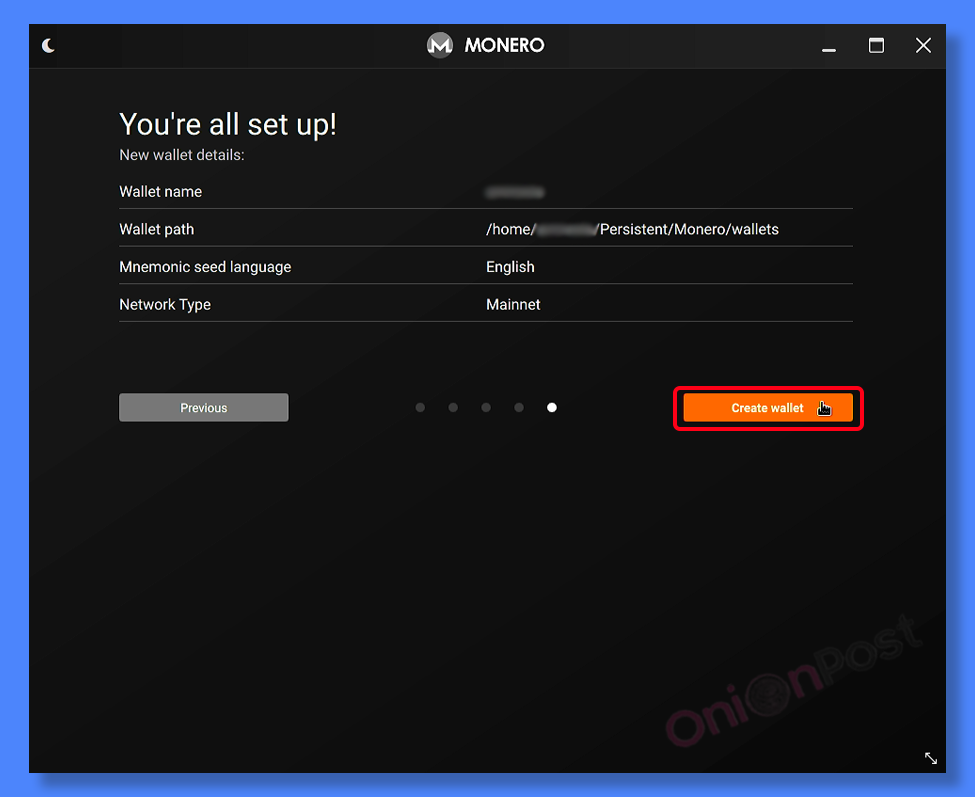
Now you need to create a new wallet in the Monero GUI Wallet:

The “Restore height” should also be written along with the recovery phrase.
!NB
If you store the recovery phrase in Tails, it is convenient to store it in the KeePassXC password manager. Or just in a text file in the Persistent folder. Remember that the contents of folders outside the Persistent folder will be deleted when you restart your computer.
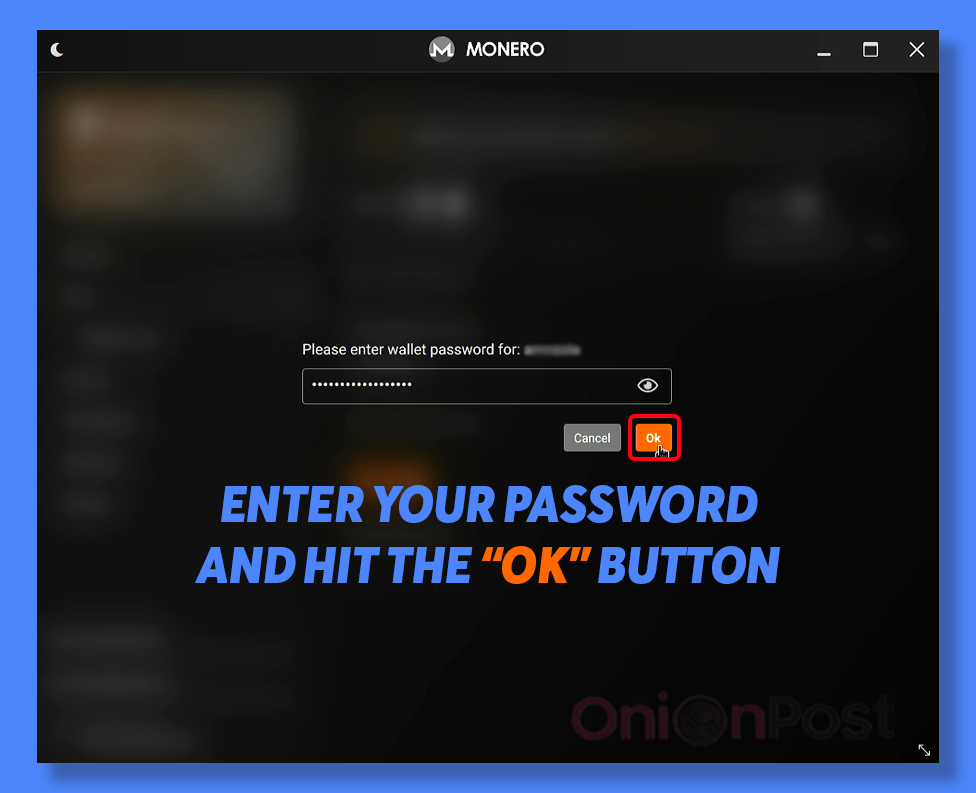
The wallet password is only valid for this device. Without a password, you can access the wallet by using the recovery phrase – from the same device or from another device. By default wallet files are located at /Home/Persistent/Monero/wallets/amnesia

Once the blockchain is downloaded, you can use the GUI without Terminal by specifying the path to the blockchain. However, if you use Terminal, you can get more information about what is happening in the application.
And then
Network status is initially “Disconnected”. The connection should be established automatically. If not: Settings => Node => Start daemon.
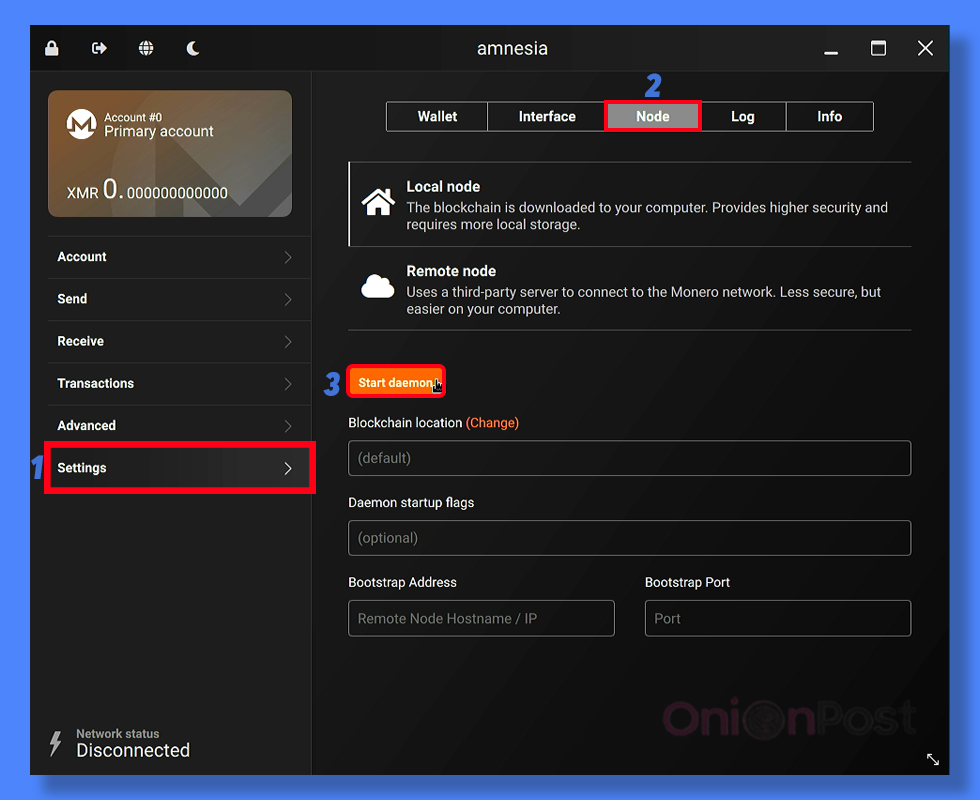

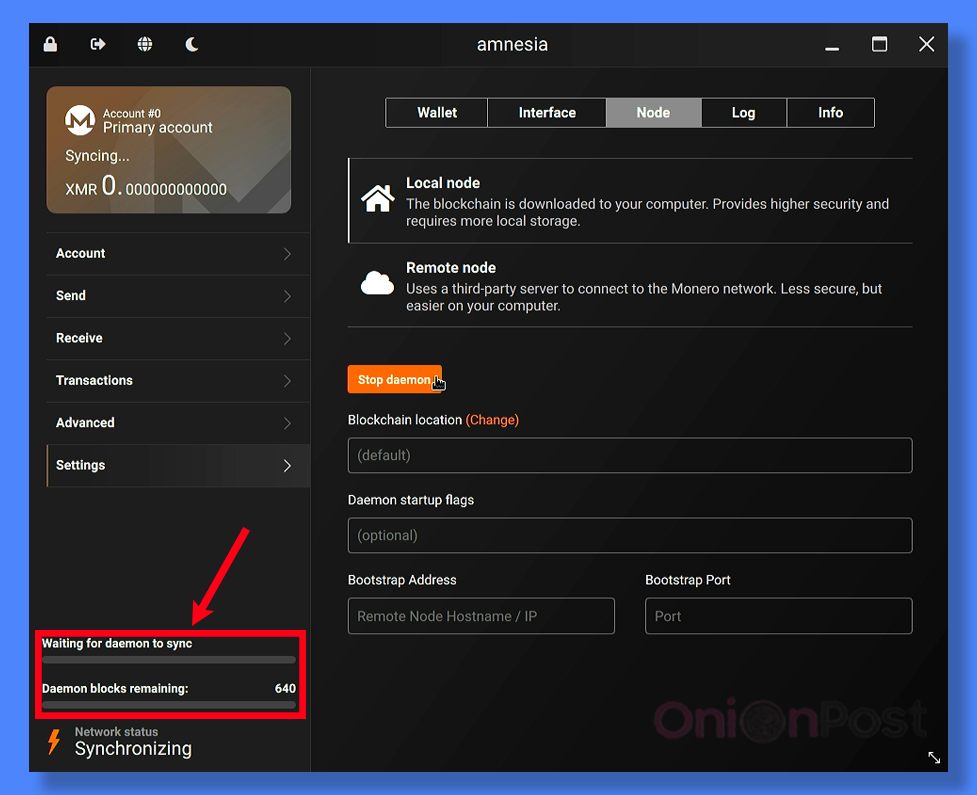
And wait the “Network Status” to become “Connected”
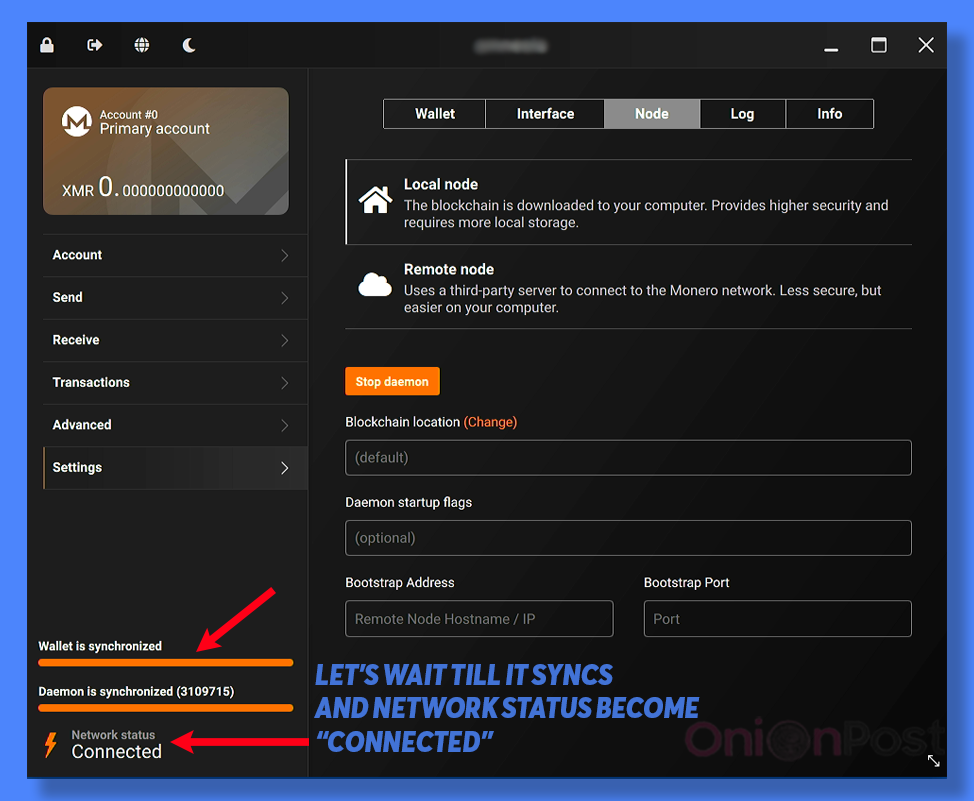
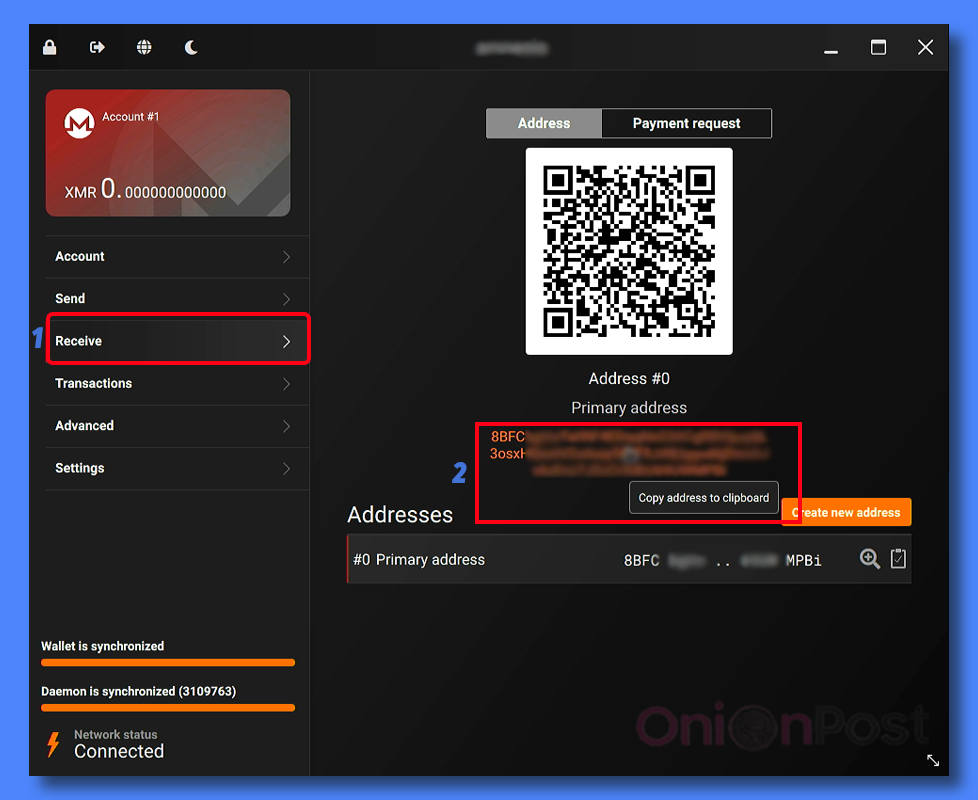
Now the wallet is connected to the daemon. You are good to go. To accept Monero from someone, you need to give the sender your account address. Initially you have one account and one address, but you can create as many as you wish.
Receive => Copy address
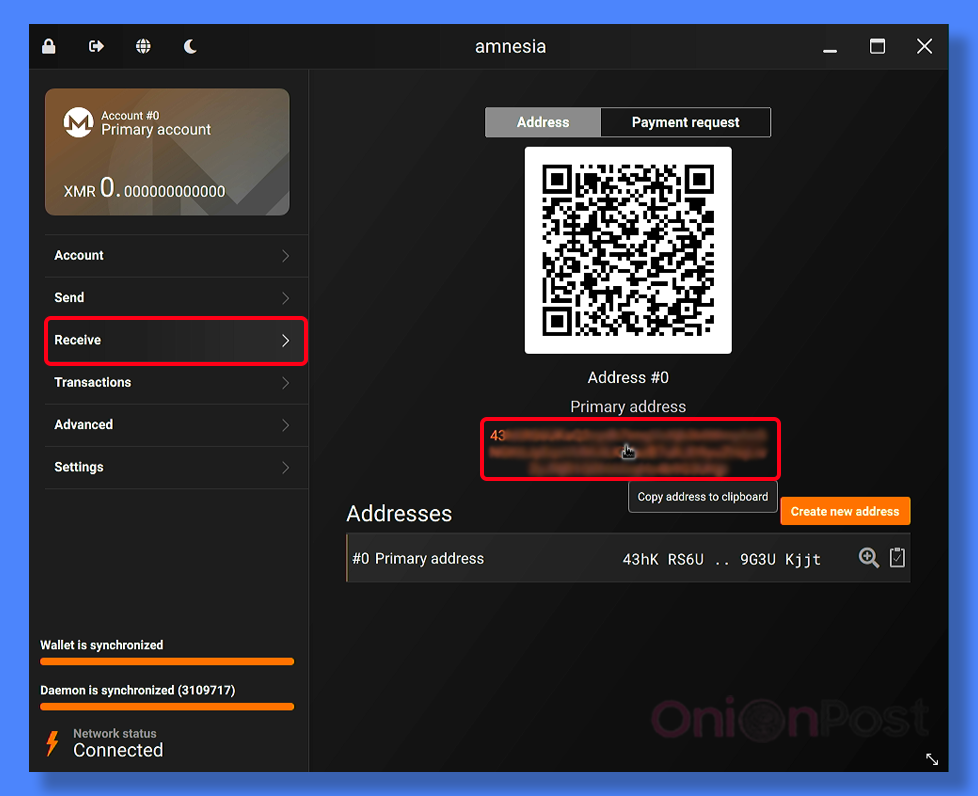
When exchanging other cryptocurrencies or fiat for Monero, this address must be given to the exchanger. The exchanger receives the currency you want to sell. And then exchanger sends Monero to your address.
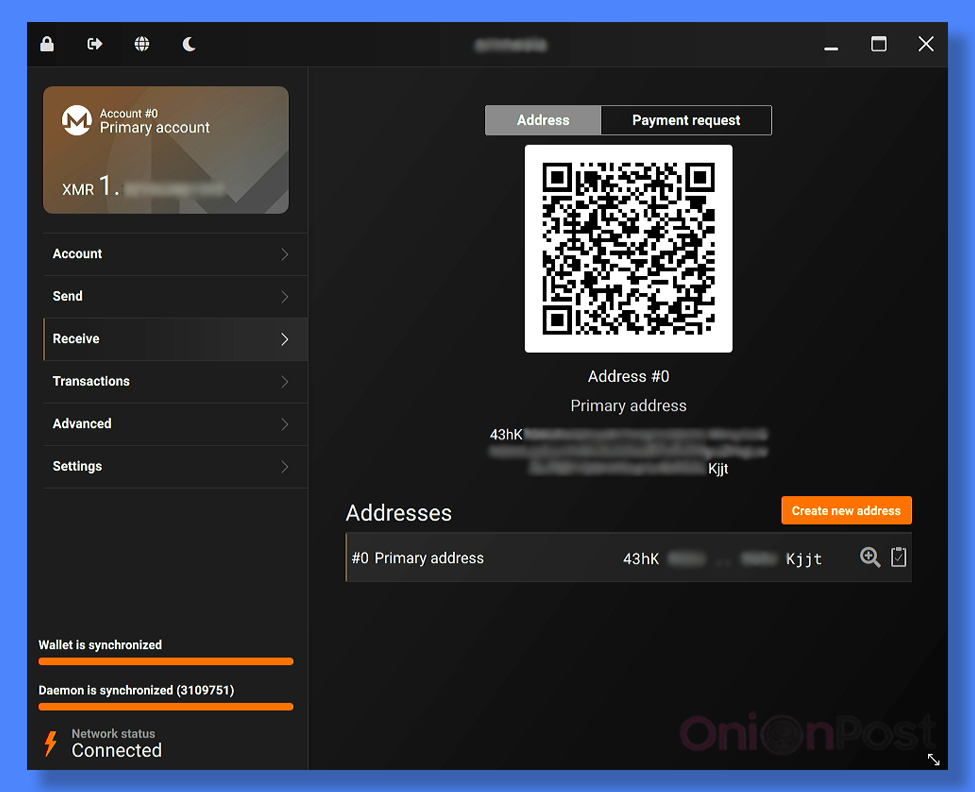
Monero recieved
Now you need to send Monero to yourself several times. Ideally 5-10 times. Each time to new account:
Address #1 => Address #2 => Address #3 => Address #4, etc.
If you need to divide the funds into several independent parts, it’s better to do it the third or fourth time and then send each of these parts 5-10 times.
!NB
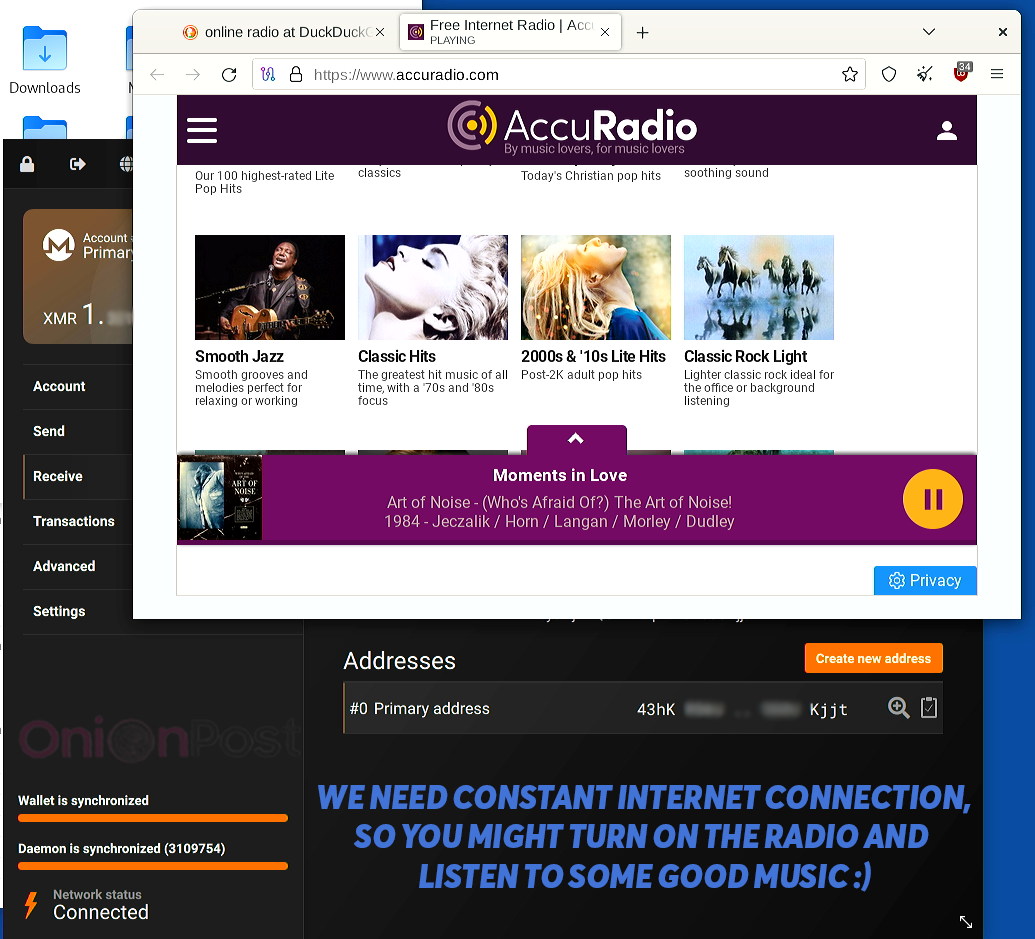
Sometimes transactions sent from the Monero Wallet take an unusually long time to be confirmed. This can be due to Internet and Tor disconnections and reconnections. Apart from the obvious (e.g. not changing your Wi-Fi network while sending), having a web application in your browser that constantly uses the Tor connection, such as Internet Radio, may help. Such an application running in the background will show you if Tor conectio is fine. It is also possible that such an application will prevent Tor from losing a good connection to the network.
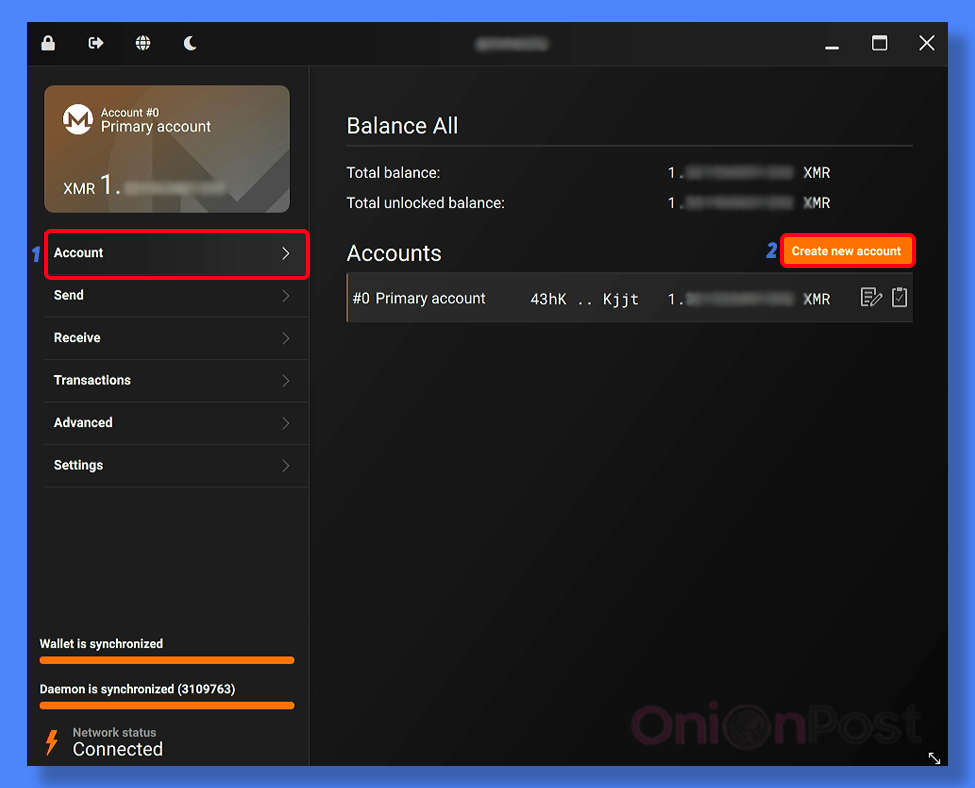
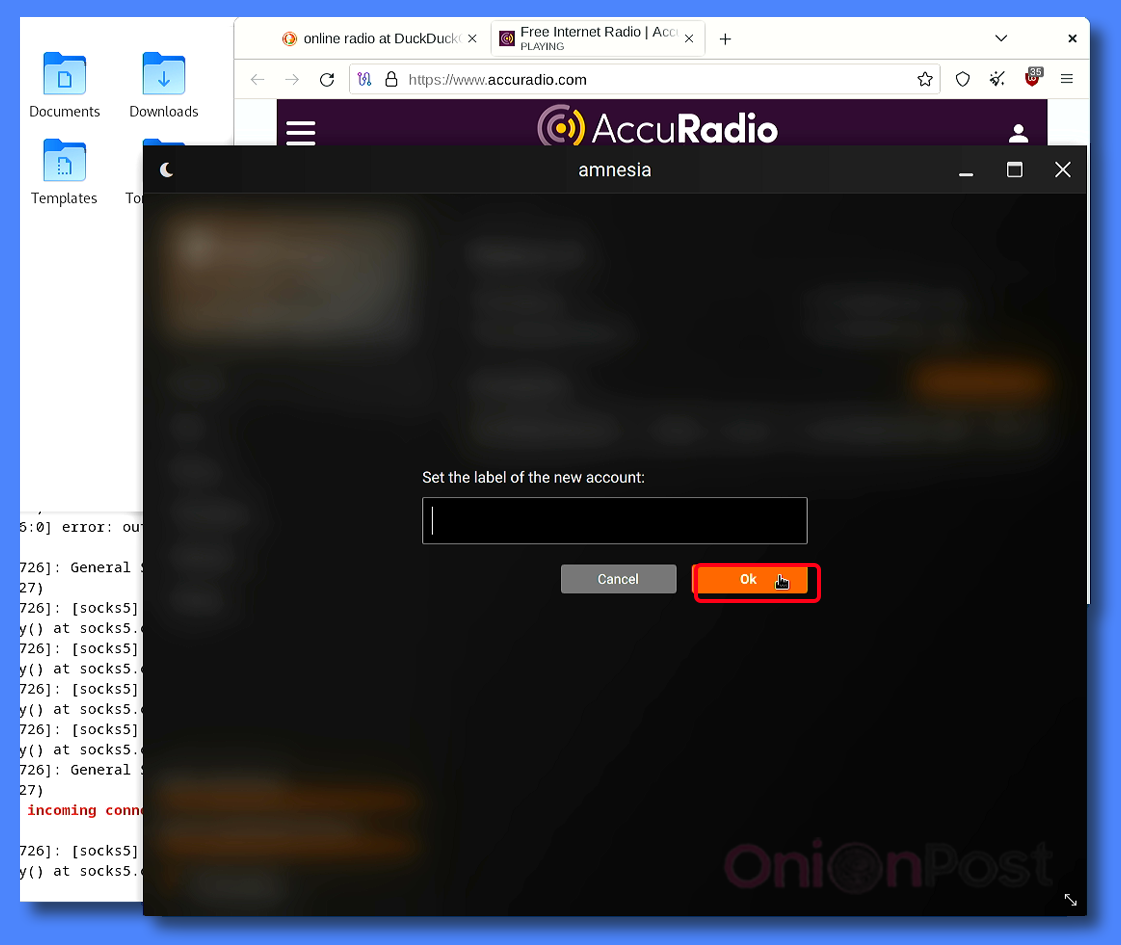
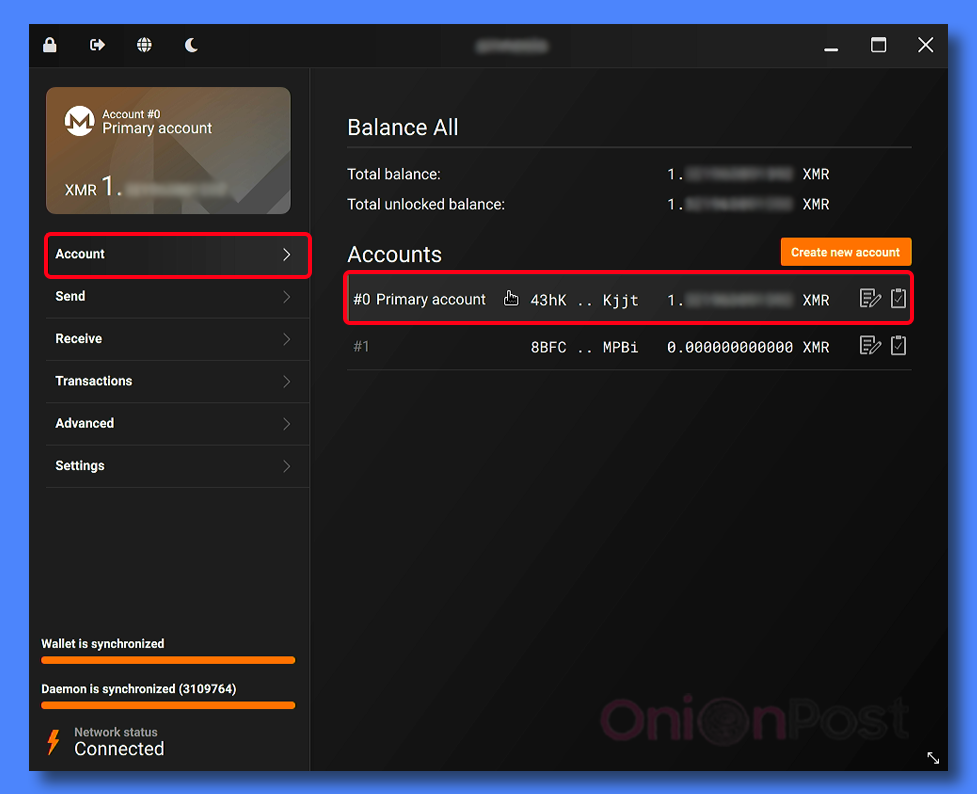
Create a new account.
To do this, go to the Account tab and press “Create New Account”. You don’t have to name the new account, but you can. In our example each account is used to recieve only one transaction and send one transaction.
Click on the account you have created, and then click on “Recieve” on the left => copy the account address
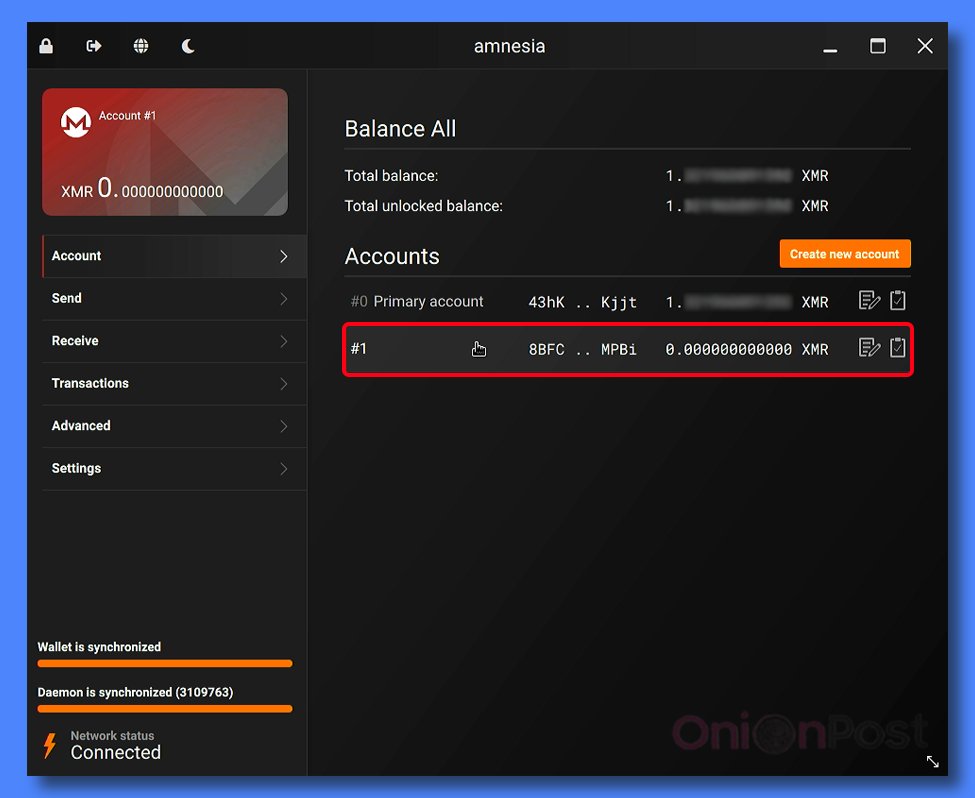
Then switch to the account that has Monero coins on its balance
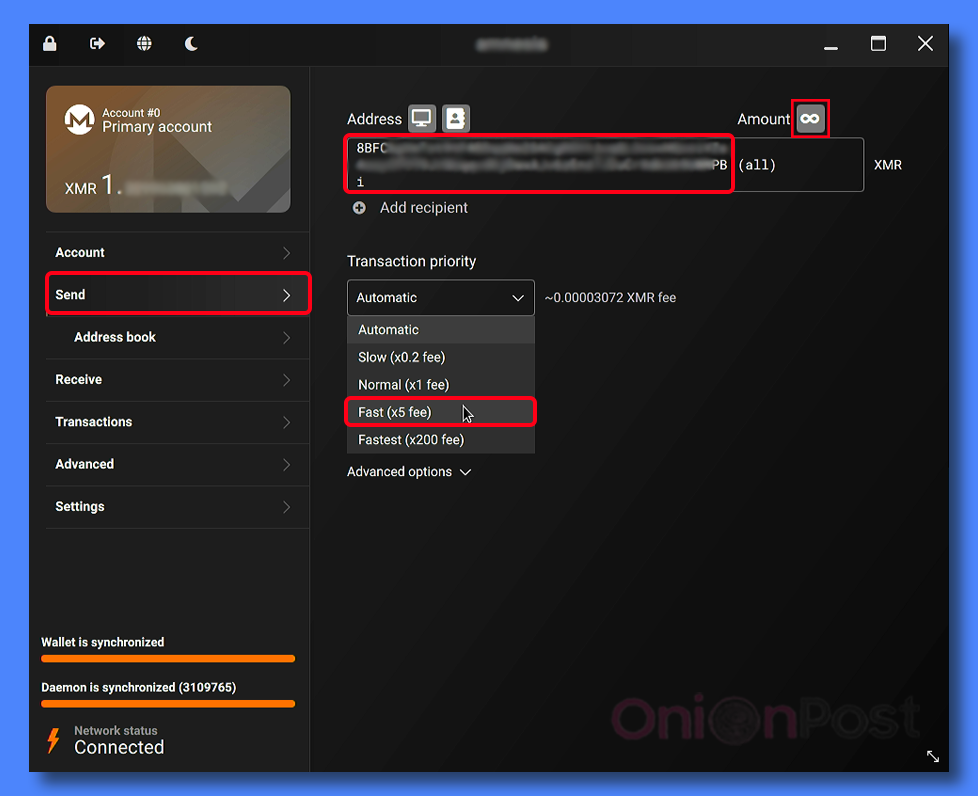
Click on “Send” on the left
Enter the address of your new empty account. Right click on the infinity icon (∞) to send the entire balance of your account. In the “Transaction Priority” drop-down box at the bottom, it is better to choose commission x5 or x200. Click “Send”.
!NB
If at this stage the spinning waiting animation does not disappear immediately, but remains for 10 seconds to several minutes, this is a sign of an error. Do not proceed, or otherwise the transaction you’ve sent may lag for 2-4 days waiting for confirmations.
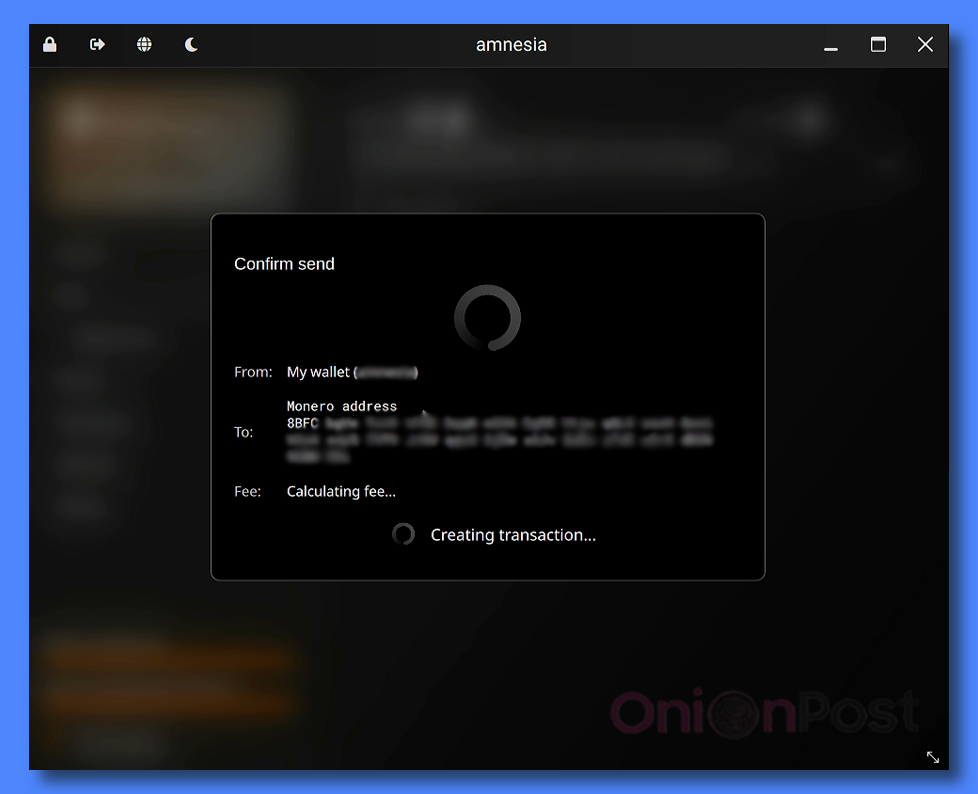
Instead, restart the Monero daemon in the Terminal and restart Monero Wallet GUI. Correct shutdown procedure for the Terminal daemon is described below in the Appendix #1.
Usually everything works fine after the first restart of the application.
Normally, after pressing the Send button, the waiting animation should disappear almost immediately or within a few seconds.
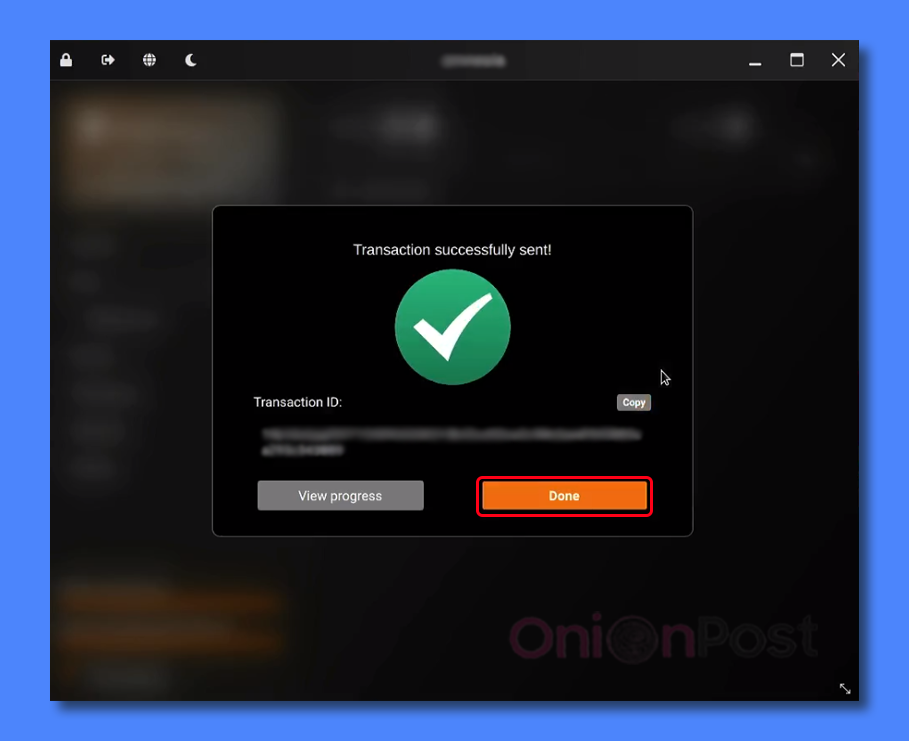
Enter the password and confirm. The trasaction is sent and the recipient sees the incoming transaction immediately. The next transfer can only be made after ~20 minutes, when transaction gets 10 network confirmations.
Typically, if the Monero network is not overloaded with requests, it takes 1-6 minutes to get the first network confirmation.
After 5-10 transfers to your own freshly created accounts, Monero can be used for any purpose – any third party can’t know the origin of your coins without access to your Monero wallet.
Appendix #1: Monero app shutdown procedure
First stop the application in the Terminal with the shortcut Ctrl-C:
Another way to do this is via GUI => Settings => Node => Stop daemon

However, Terminal sometimes does not respond to neither of these shutdown commands. In this case, you should either wait a few minutes or enter these commands in the Terminal one after another:
save

stop_daemon
You should then wait for the application to shut down. This usually takes between 1 and 30 minutes. In rare cases even more.
When Terminal is closed, you can also close the GUI.
Later, when you start the Monero Wallet, it will synchronize with the Monero network (download new part of the blockchain). This usually takes anywhere from a few minutes to several hours, depending on your Internet speed and the amount of time you have not syncronized.
Appendix #2: downloading blockchain without Tor
If the blockchain is to be stored on a separate storage device, that storage can be connected to an operating system that allows you to download the blockchain without using Tor. Only do this if you are sure what you’re doing and your threat model allows such action.
For example, in Ubuntu or Debian, in the Terminal you need to run the command
./monerod --data-dir /media/"NAME_of_User"/"NAME_of_your_SSD"/blockchain
“NAME_of_User” is your local username and “NAME_of_your_SSD” is, obviously, the name of your SSD.
Once downloaded, the Monero wallet should run over Tor within a privacy-aware operating system as described above.
There are no comments here yet. Be the first one!